This week’s task saw me learn more about aperture (or f-stop) and put it into practise. To start, I tested my camera’s range from the lowest to highest f-stops, before using aperture to focus on close objects and then the wider picture.
Low F-Stop (F/4.8)

For the low F-Stop, the lowest my camera and lens would go to was 4.8 so I focused on the person in the front of the frame, and the low f-stop meant that the background of trees and greenery is blurred.
High F-Stop (F/22)

In contrast, when I set my f-stop to the highest it would go (which was 22), you ca see that the person, tree behind her shoulder and people to the left of the frame are all in focus. The higher f-stop has also given the clouds and sky slightly more detail compared to the lower f-stop.
Mid F-Stop (F/9)

For a mid F-Stop, after learning from my mistake in class of setting it too high, I moved it from 4.8 to 9 so that it got the person in the foreground and the tree behind her shoulder in more detail. The trees futher in the distance and people to the left though are more blurred compared to the highest f-stop.
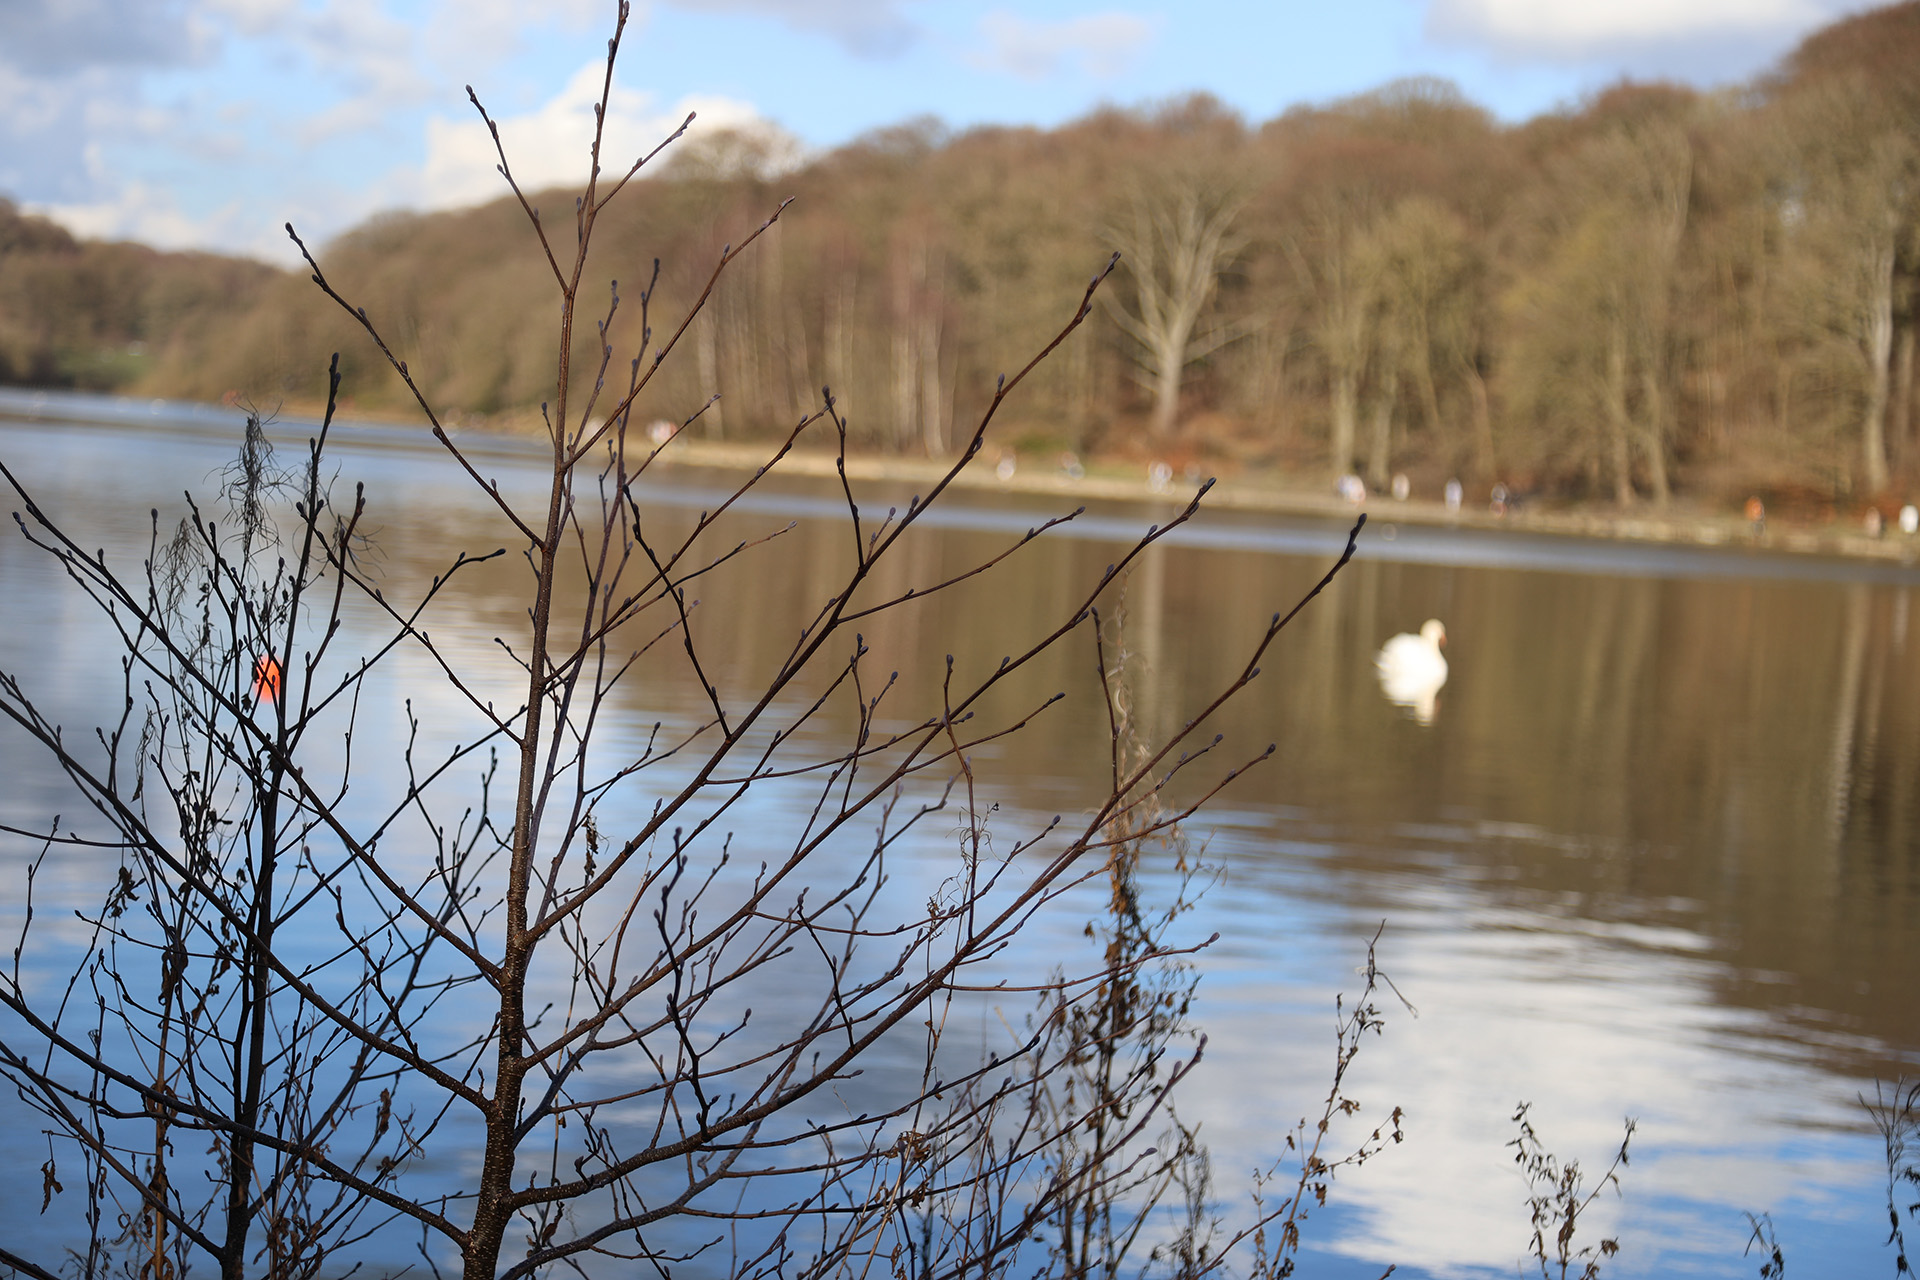
Extra Credit
For my three objects, I chose to take an image of a small plant in the foreground, the swan and lake in the middleground, and the treeline in the background.
Near in focus
All in focus

Extra Credit
For the extra credit task, I shot my three items (speaker, candle and boots) with my Canon R6 Mk2 with a 24-105mm lens.
To achieve getting all the items in focus, I set my f-stop to F22 on the camera, meaning that the ISO set itself around 250 as there was plenty of light getting into the sensor.

For getting just the speaker in focus, at an F-stop of F4, which was the lowest my lens would go down to, I saw that the ISO sparked up to 8000 as the sensor got less light in. In terms of shutter speed for both photos, I noted that it stayed the same around the 1/80 or 1/100 mark.


You must be logged in to post a comment.