Whilst doing some research into shutter speed, this what some professional sports photographers had to say about it.
Sports photography is all about Shutter Speed.
The gold standard for a sports photographer is a faster shutter speed of 1/1,000.
The faster shutter speed of 1/1,000 allows a sports photographer to freeze the high-energy action shots that we often see during a sporting event.
If you want to capture action shots that don’t have any motion blur, you want the fastest shutter speed your camera can deliver.
Most sports take place in brightly lit conditions. This is a huge advantage for photographers looking to use a quick shutter speed.
You might need to drop down to a slower shutter speed if you’re shooting a sporting event that takes place in a dimly lit arena.
You may also need to switch up shutter speeds when the lighting conditions change, like for a halftime show or if you’re taking pics of fans in the stands.
For shooting sports such as football example a shutter speed of anything from 1/500 – 1/1,000 will freeze any human, however the may still remain blurry and you may have to increase it.
Shutter speeds between 1/100th of a second and 1/500th of a second will freeze most human motion. A fast sprinter or someone swinging their arms or legs will probably have some motion blur. There’s also the risk if you’re using a long lens that your shutter speed won’t be fast enough to prevent blur from the camera shaking in your hands.
In week 5, we were taught about ISO and Shutter Speed. This is extremely relevant for me in particular and my current plan for my assignment. As my project will include some sports photography elements. I will need to capture some images where a player is kicking a ball for example with no blur.
I had a brief idea what shutter speed was before the workshop but I had never heard of ISO before the workshop and how it can help an image’s brightness. This could be particularly applicable to me and my project if I choose to go to a night game and get images for my project when it is not daylight. For a night game, even if the floodlights are still on, being able to change the ISO on my images may still be necessary.
The extra credit task was based around doing more research into ISO and Shutter Speed which is handy because I was already planning to do some independent research into this area before I began to do my assignment anyway, in order to improve my understanding about these two settings.
I attempted to do the week 5 photos task but I was unsure about my final execution of the task so I will have to get feedback during my next workshop.
In the week 4 workshop, we were taught about aperture (F-stop) and how a lower F-stop setting allows more light in, however, that means less of your image is in focus. Whilst on the other hand, a higher F-stop setting means you get less light, but more of your image is in focus.
Before today’s workshop I never knew what F-stop was and how you could change it on your phone, but we got a chance to get used to this new setting as we had the chance to take some photographs outside.
I took a variety of images but for some of my images I could not tell a difference in my images after altering the F-stop setting and I am not quite sure why. However, on some other images, I was clearly able to see the difference between the three images and how the respective F-stop setting affected the final product.
There was also an extra task for extra credit that I attempted but am unsure about how successful my execution was. I feel like I got a decent shot of a subject in the foreground whilst ensuring the background was more blurred to ensure the subject at the front stood out. However, for the other task of getting three objects on a flat surface in sharp focus I struggled as I was unsure what objects would be best and most appropriate for the shot.
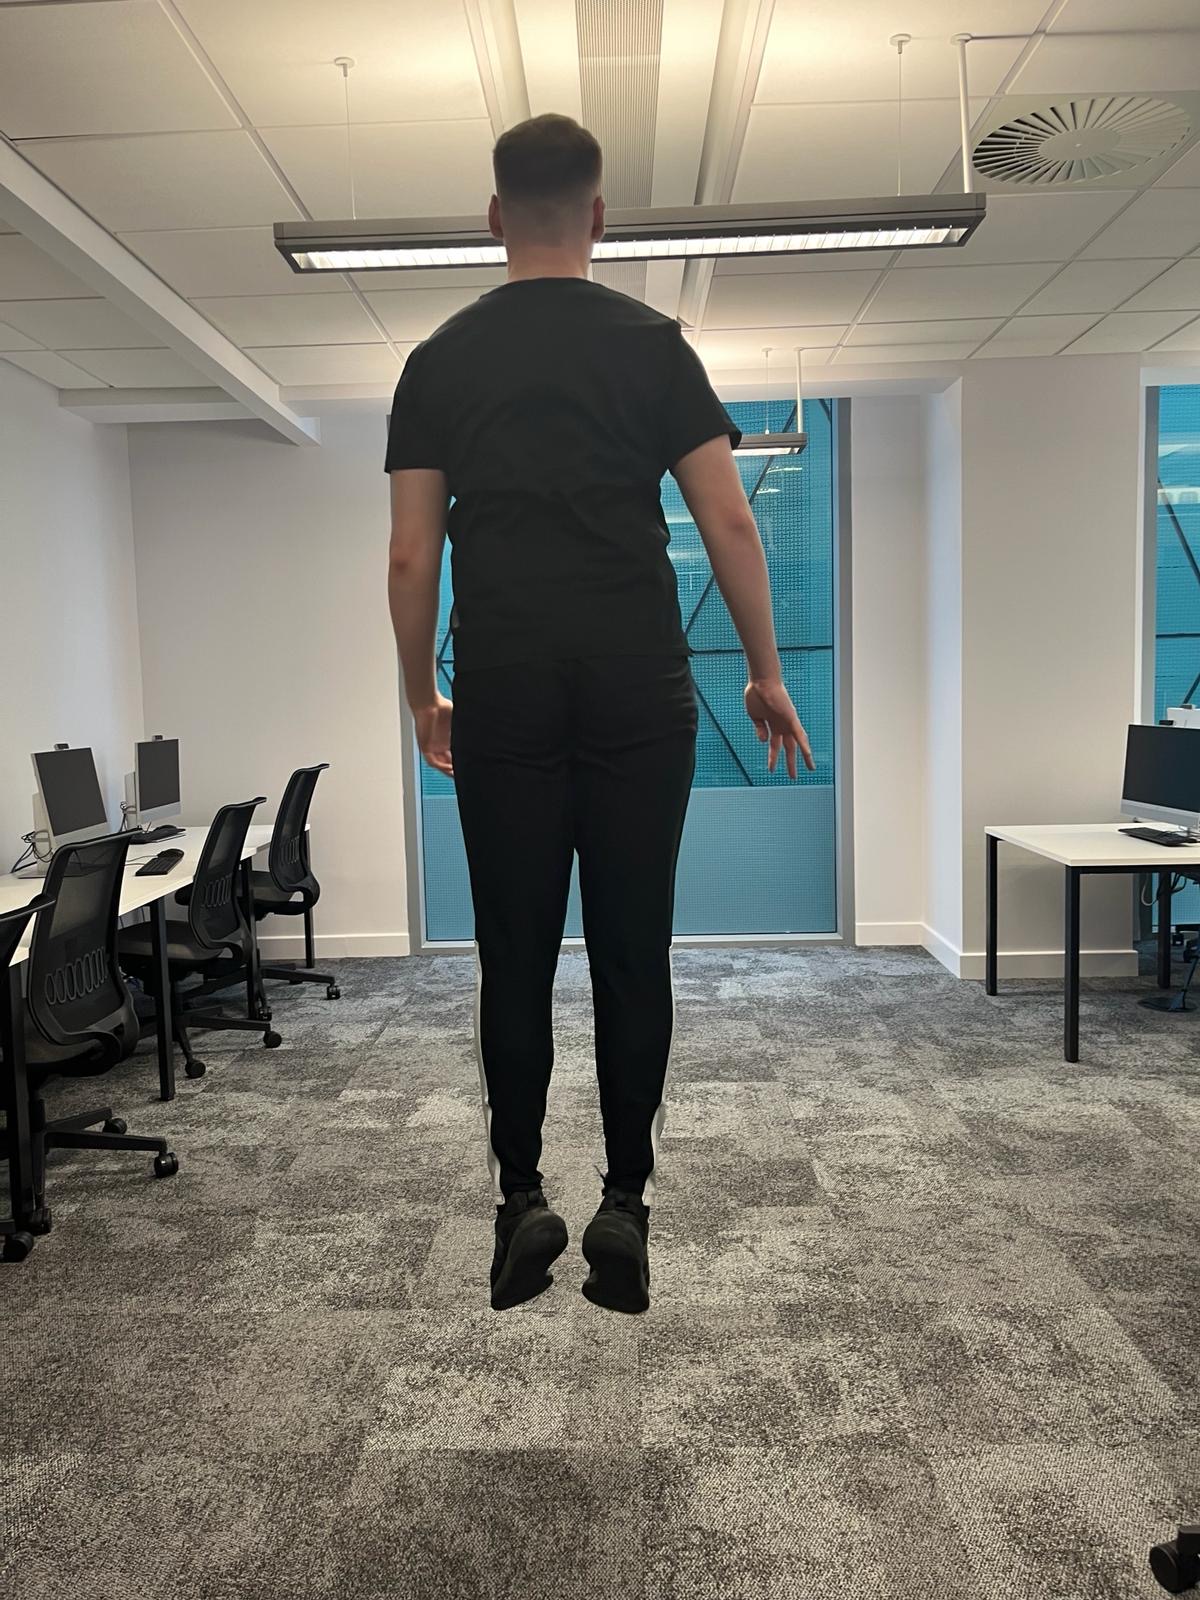
Initially, I took three photos on the variety of f-stop settings but I could not notice any differences between the images. I am not sure why this happened and I need to learn why before I go out and take photos for my project but this led to me taking the photos you see now on this post.
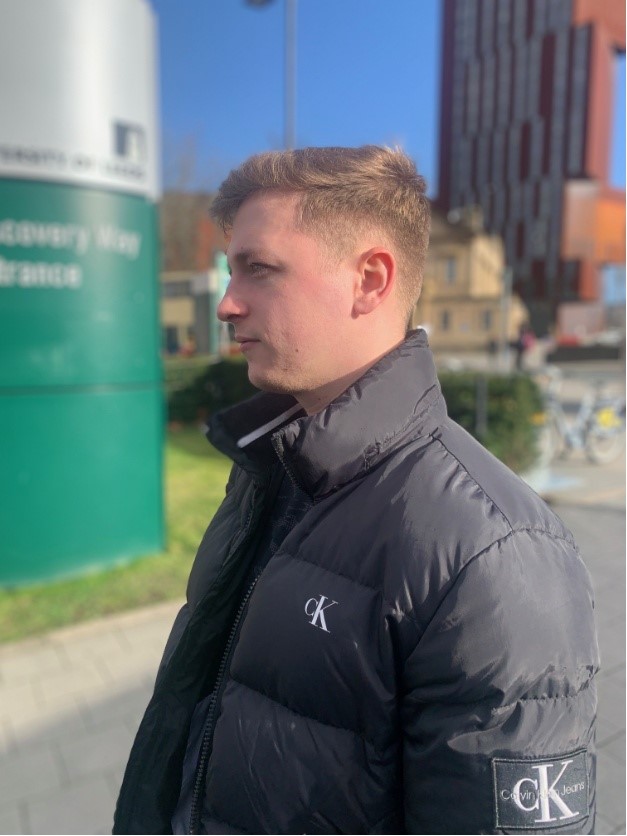
The image above is on the lowest f stop setting as I wanted the subject (Dan Sewell) to be in the foreground and in focus with the buildings in the background to be blurred and this led to the image you see above.
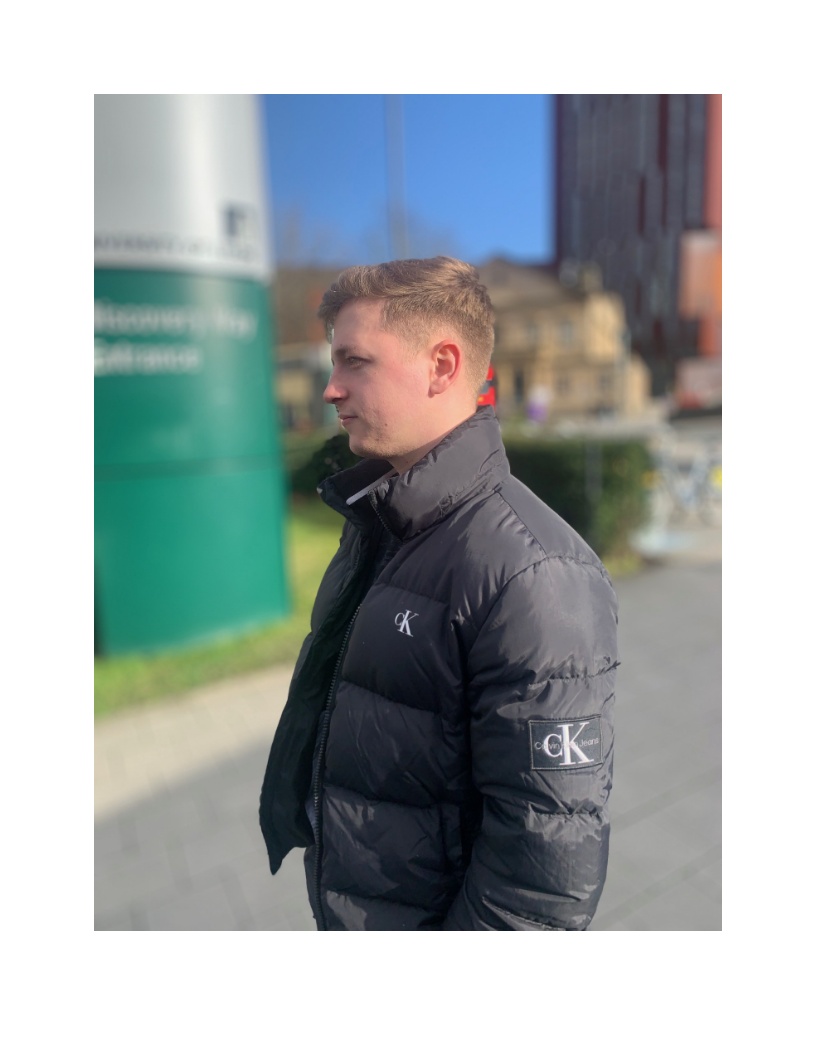
The second photo was taken in portrait mode on the highest f-stop setting. This resulted in both the subject and the background being in focus and the difference in the image quality of the buildings in the background really highlights the difference the f-stop setting makes to the final product.
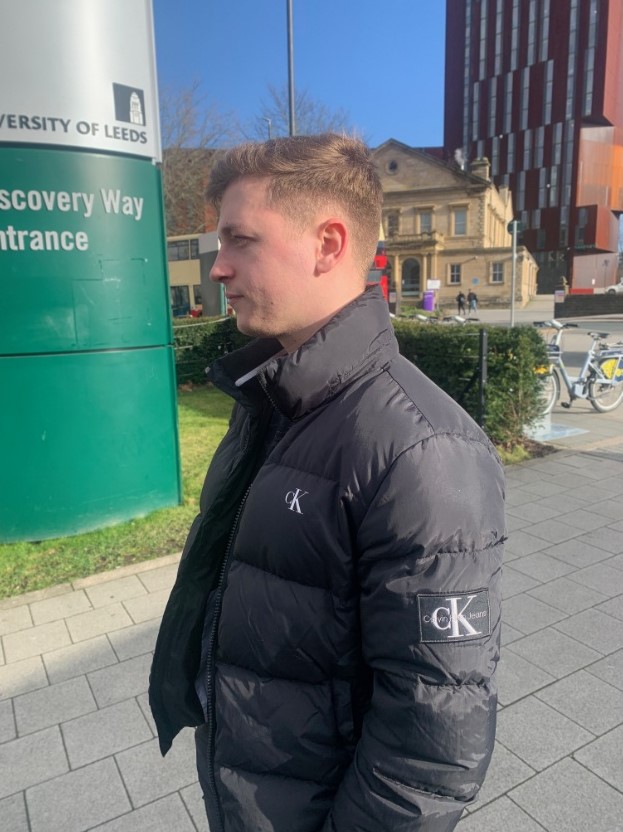
The third and final image was taken with the f-stop setting somewhere near the middle. I slightly lowered the f-stop setting resulting in a slightly blurred background that is not as harsh as the blur in picture 1, whilst still having a crisp focus on the subject in the foreground.
Extra Credit photo attempts
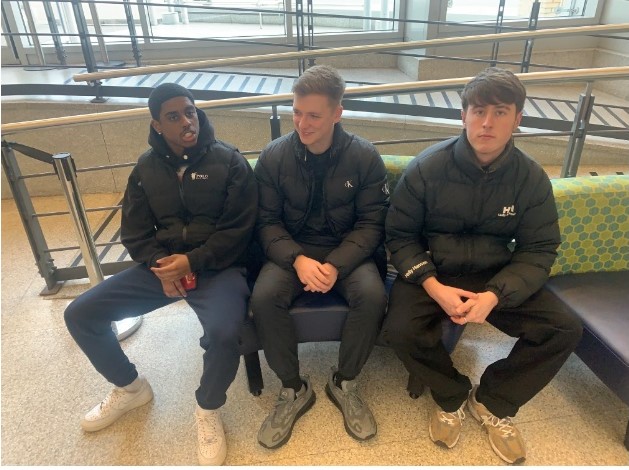
The first photo below is captured with three subjects in focus. However, I misread the task sheet and didn’t realise it had to be on a flat surface.
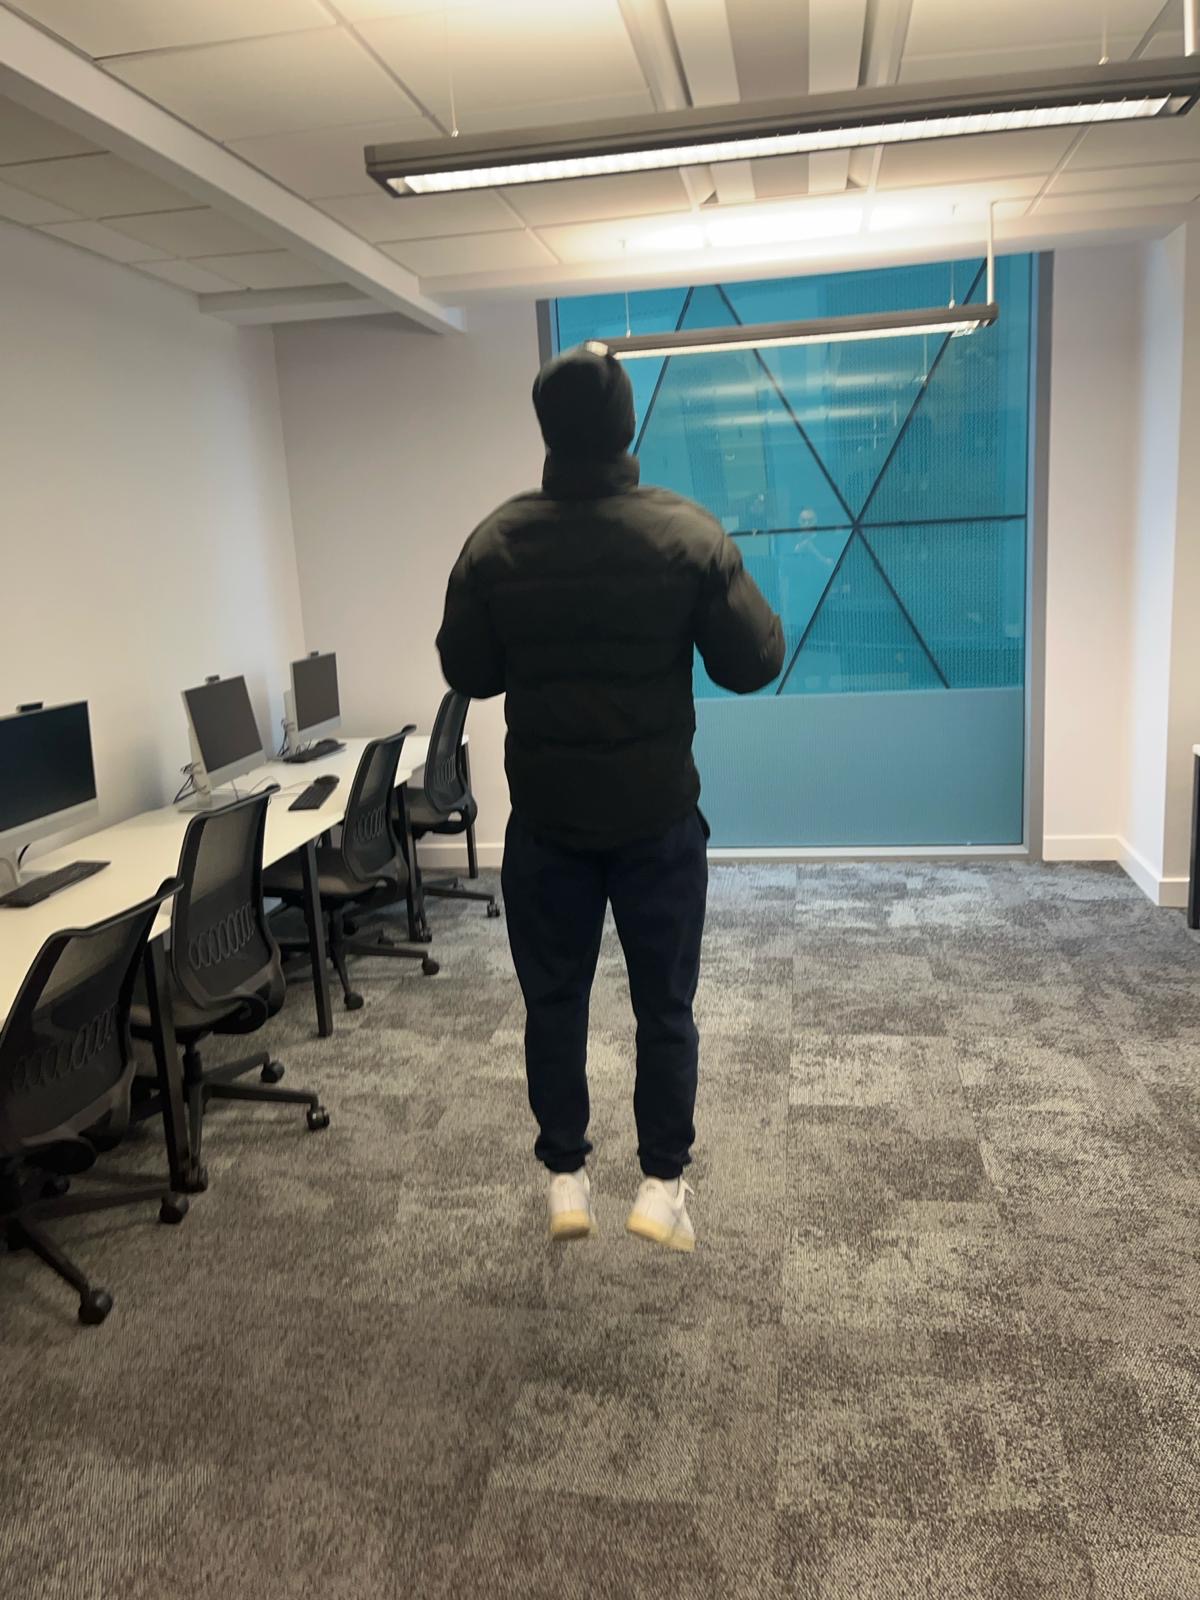
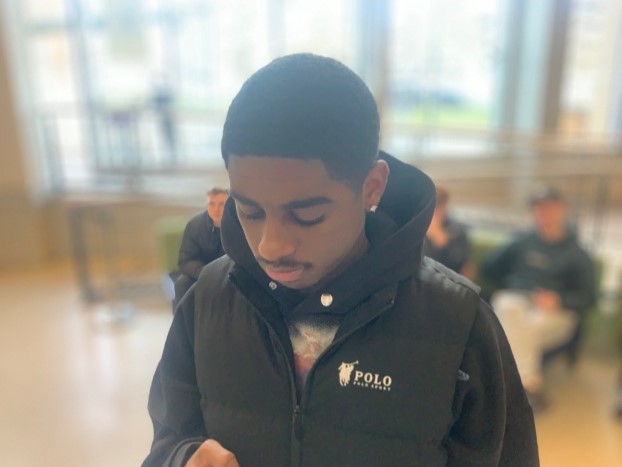
For the second extra credit image we had to capture a photo indoors where only the nearest object is in focus and I think this came out quite well as you can see the blurred subjects in the background whilst maintaining a clear focus on the subject in the foreground.
During the week 3 workshop, we learnt how to alter images using Photoshop to then put on WordPress. We changed portrait images into landscape as well as altering the pixel sizes of some images, so they look better once they are displayed on the photojournalism website.
As it was my first ever time using Photoshop, I had to get familiar with it’s layout and that is something I will still need to practice throughout this module. I may need to ask for additional help in class and/or look at some YouTube tutorials to help with any problems I encounter. Some of my class mates are proficient when it comes to using Photoshop so I could always ask for their help too if needed.
Furthermore, because it was my first time using Photoshop, I did not finish the task where we had to resize the three images but I plan on finishing that task after my lecture on Thursday.
The other task we have to do before the week 4 workshop is to submit a pitch for our project that we will be working on for our assignment. I have had a vague idea since week 1 that I have discussed with Karl during the week 2 and week 3 workshops so I will need to properly flesh out that idea in preparation for week 4.
During the week 2 workshop, I learned about the different types of photography. As I have never been taught anything photography related before. This was all new to me and I had never even considered the different styles of photography prior to the workshop.
One of the styles we were taught about was sports photography and as this style of photography will make up elements of my project, I decided it would be appropriate to do my research task on sports photography.
We were given this task to do before the week 3 workshop and during my research I found tips that were helpful and are things I need to consider when taking photos for my project.
However, sports photography will not be the only genre implemented in my project. As my plan is also to include headshots of people, perhaps these may take a more ‘documentary’ style approach.
This one of the styles I was first introduced to in this workshop so despite it not being a task for us, I may need to conduct some sperate independent research into this area and get feedback from my tutors on any documentary style photo I take. This will go alongside me continuing to develop my understanding of sports photography too.
For the first week of photojournalism, we were expected to go out and take photographs ourselves however this plan changed due to the weather.
As we needed a photo for the week 1 workshop task, I came up with the idea of getting a quick interview and photo of Carlos Nunes, who is the top scorer for the Leeds Beckett Futsal team. So, before they trained on Tuesday evening, I drove up to the Headingley campus to get a headshot of Carlos.
I took multiple photos with my phone of Carlos from a variety of angles as I attempted to apply what we were taught in class on Monday.
In the end I chose a close-up portrait of Carlos. I was happy with how the image turned out and this made me realise the importance of building up a relationship with the person you are photographing in order to get the best shot possible without it being awkward.
As I know Carlos, going up close for the picture was not awkward but I can imagine it could be if it is the first time you have spoke to that person or if they do not know you want to take their photo until you ask face to face.
For this workshop task I took photos with my phone however, for my assignment I think I will use a DSLR camera and rent one from the university in order to get better quality images. I also feel it is important to practice with both phone cameras and a DSLR camera just in case I cannot access a DSLR for whatever reason.
On the 20th April I attended Farsley Celtic’s final game of the season as they hosted Buxton. As discussed in the last project update I intended to bring a camera to this game which I did and this allowed me to get better up close action shots of the game.
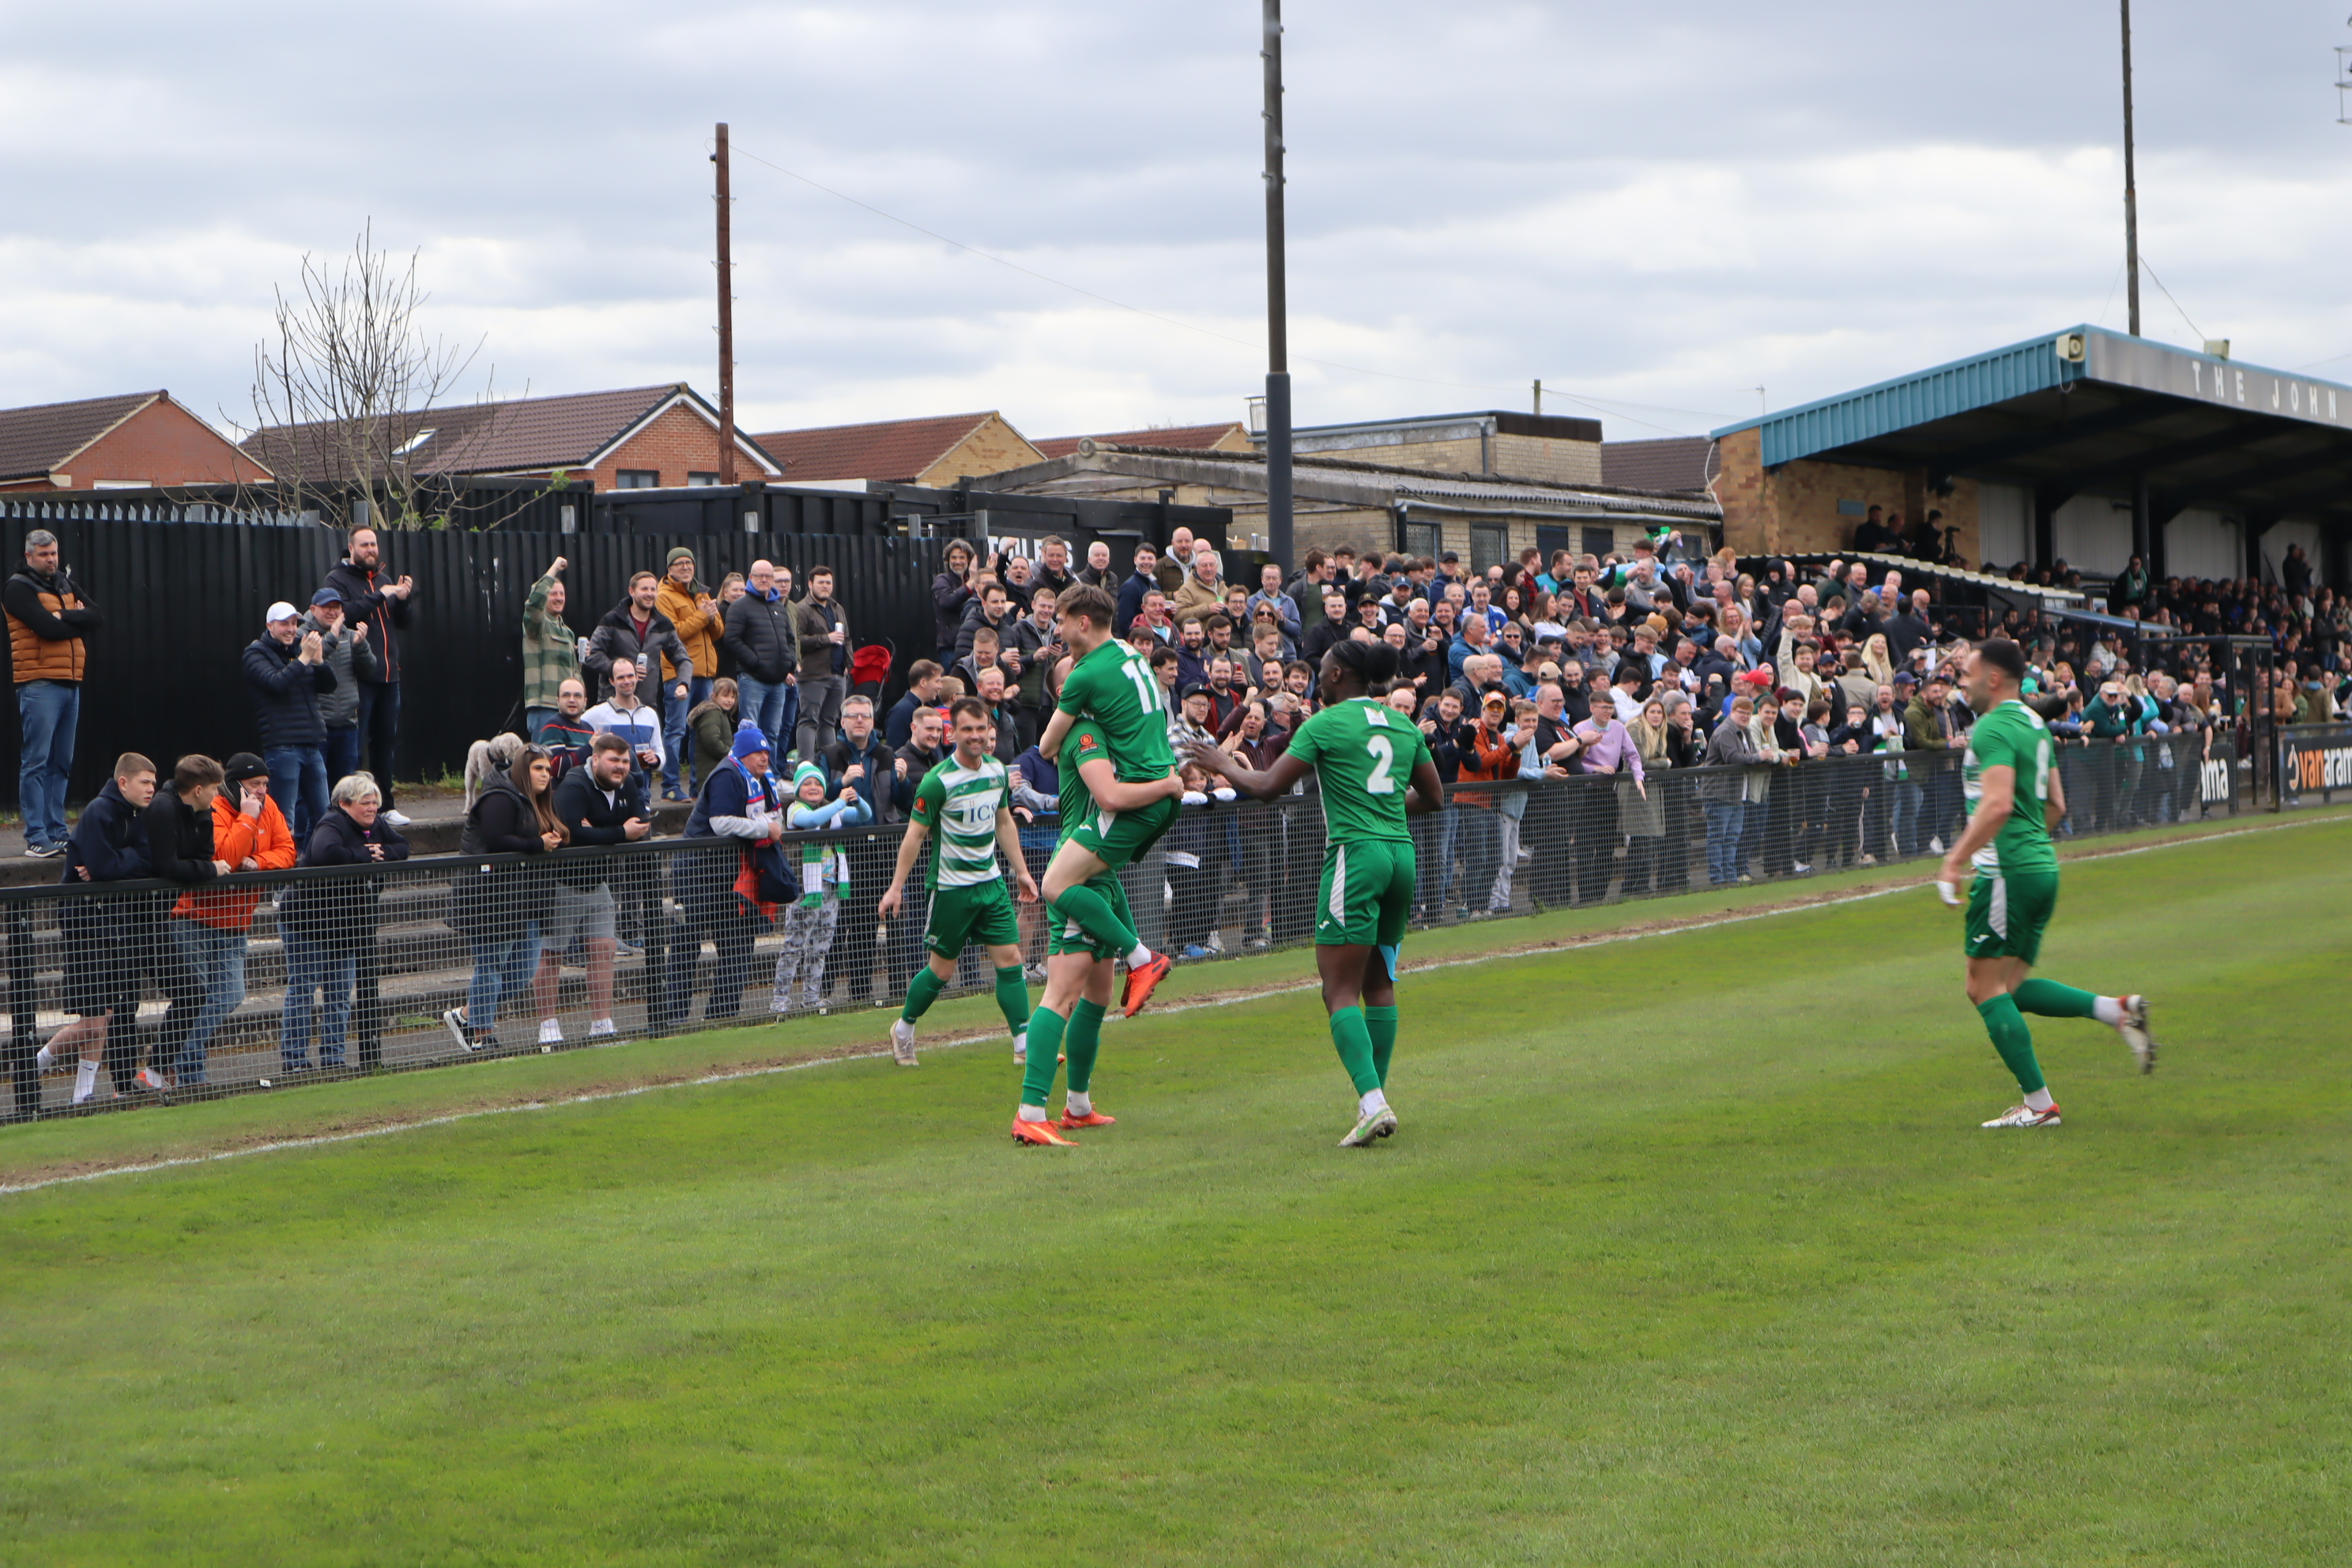
Due to the significance of the match, Farsley had a much higher attendance than normal which helped my crowd shots such as these ones below for example.
The image above was taken during the celebrations of Farsley’s opening goal. I have multiple photos of the sequence of the celebrations so I will ask Karl to help me pick out the best ones hopefully during our academic advisor meeting on the 29th.
After the goal the fans also happened to set a flare off which I captured and I think makes the image a lot more interesting.
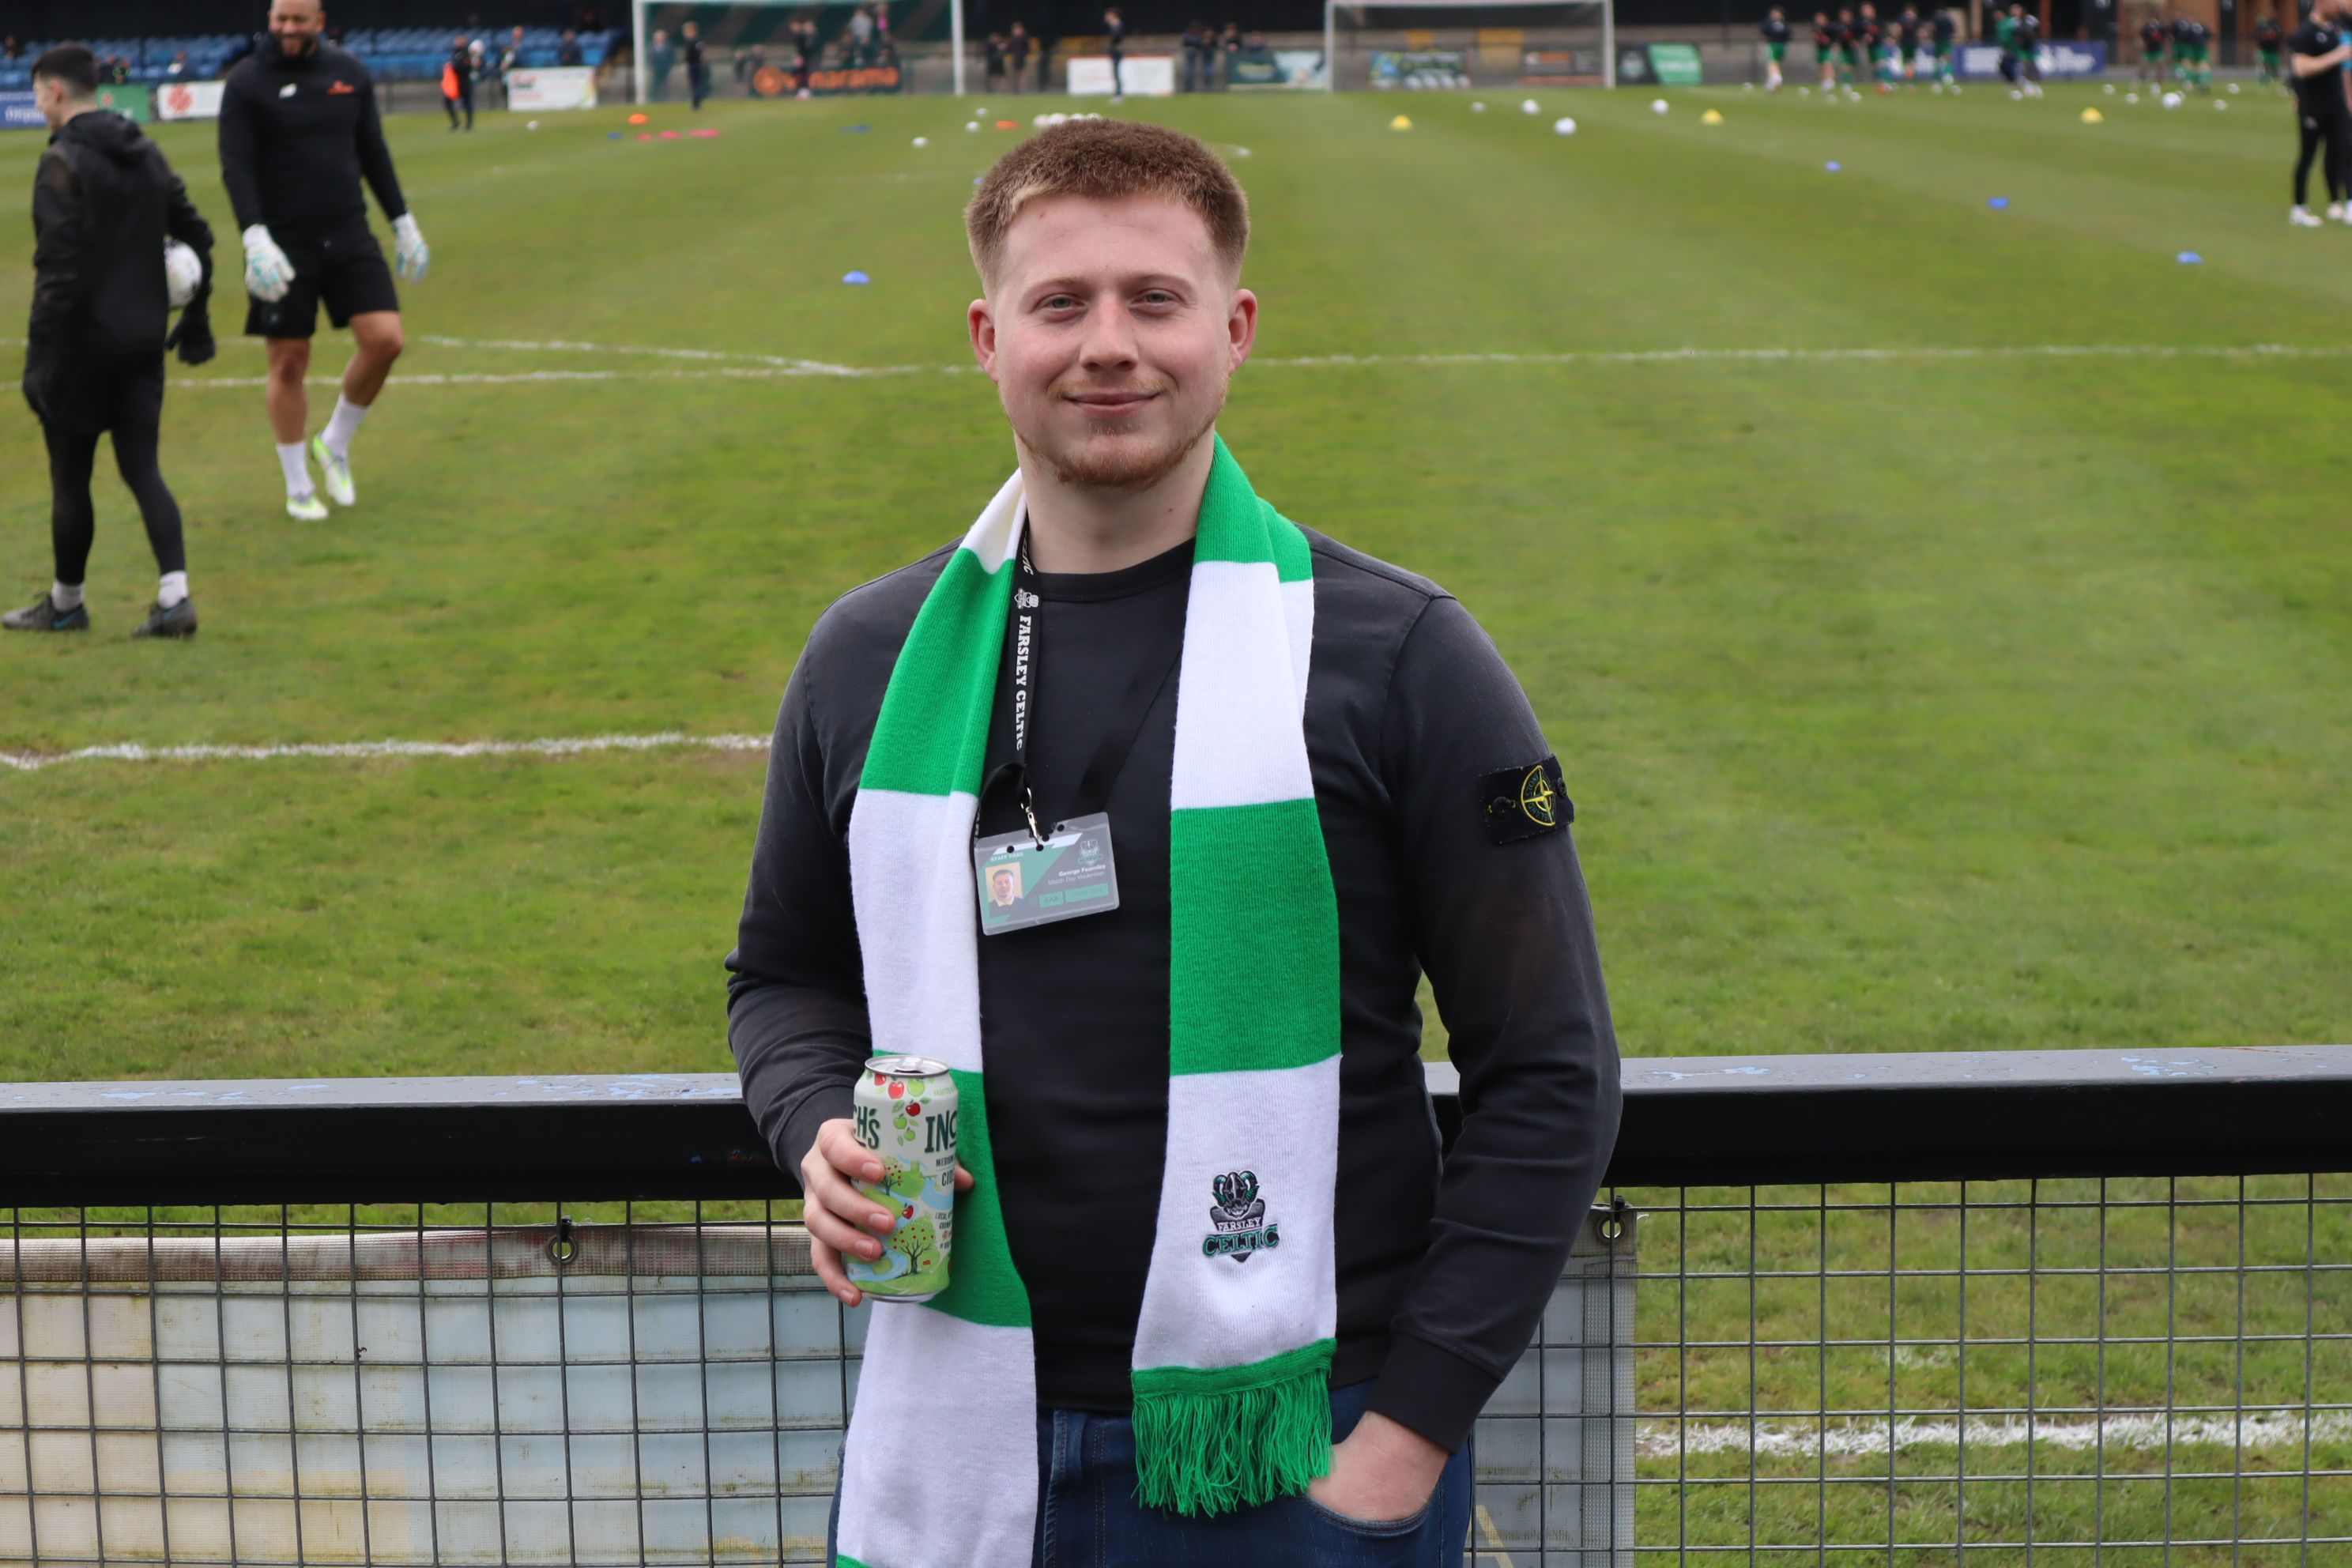
In a previous academic advisor meeting with Karl, we discussed how it would be good to get a portrait photo of my interviewees and then an image of them doing their volunteering job to help out on a matchday. As the game was so busy, I only managed to photograph 2 out of my 4 interviewees and John the photographer was on holiday for this game so I couldn’t get one of him.
However, the two people who I did photograph were Josh and George and here are their photos below.
I think these images look good with the pitch behind them as it shows how close the players and volunteers are within the club and how the work they do off the field helps the players on the field. Also, with the photo of George above I did capture a version of him by the pitch without the lager in his hand in case it was deemed to be inappropriate.
Josh, who is in the first image is the media manager at the club so it was important to also capture an image of him fulfilling his role on a matchday.
Below are two examples of him doing this but I am unsure of what type of image to use.
This one above is tempting as Josh is the main focus of the image and is shown doing his media duties, but the fact you cannot see what he is recording could potentially mean the viewer just thinks he is stood using his phone for no reason.
This is why a photo like this could be more useful as it shows him clearly recording the Farsley player. I personally prefer the images with the players in and I have a few similar shots like this, I am just unsure whether someone might say that having the player in the photo takes the focus off Josh. Again this is something I am planning to discuss with Karl in our next meeting.
As I mentioned previously, the crowd at his game was much larger than usual so I was unable to get really close and capture George’s face in a crowd shot as I had planned, but it is arguable that the larger crowd shots such as this look better anyway as it portrays more of the people connected with the club that I did not interview.
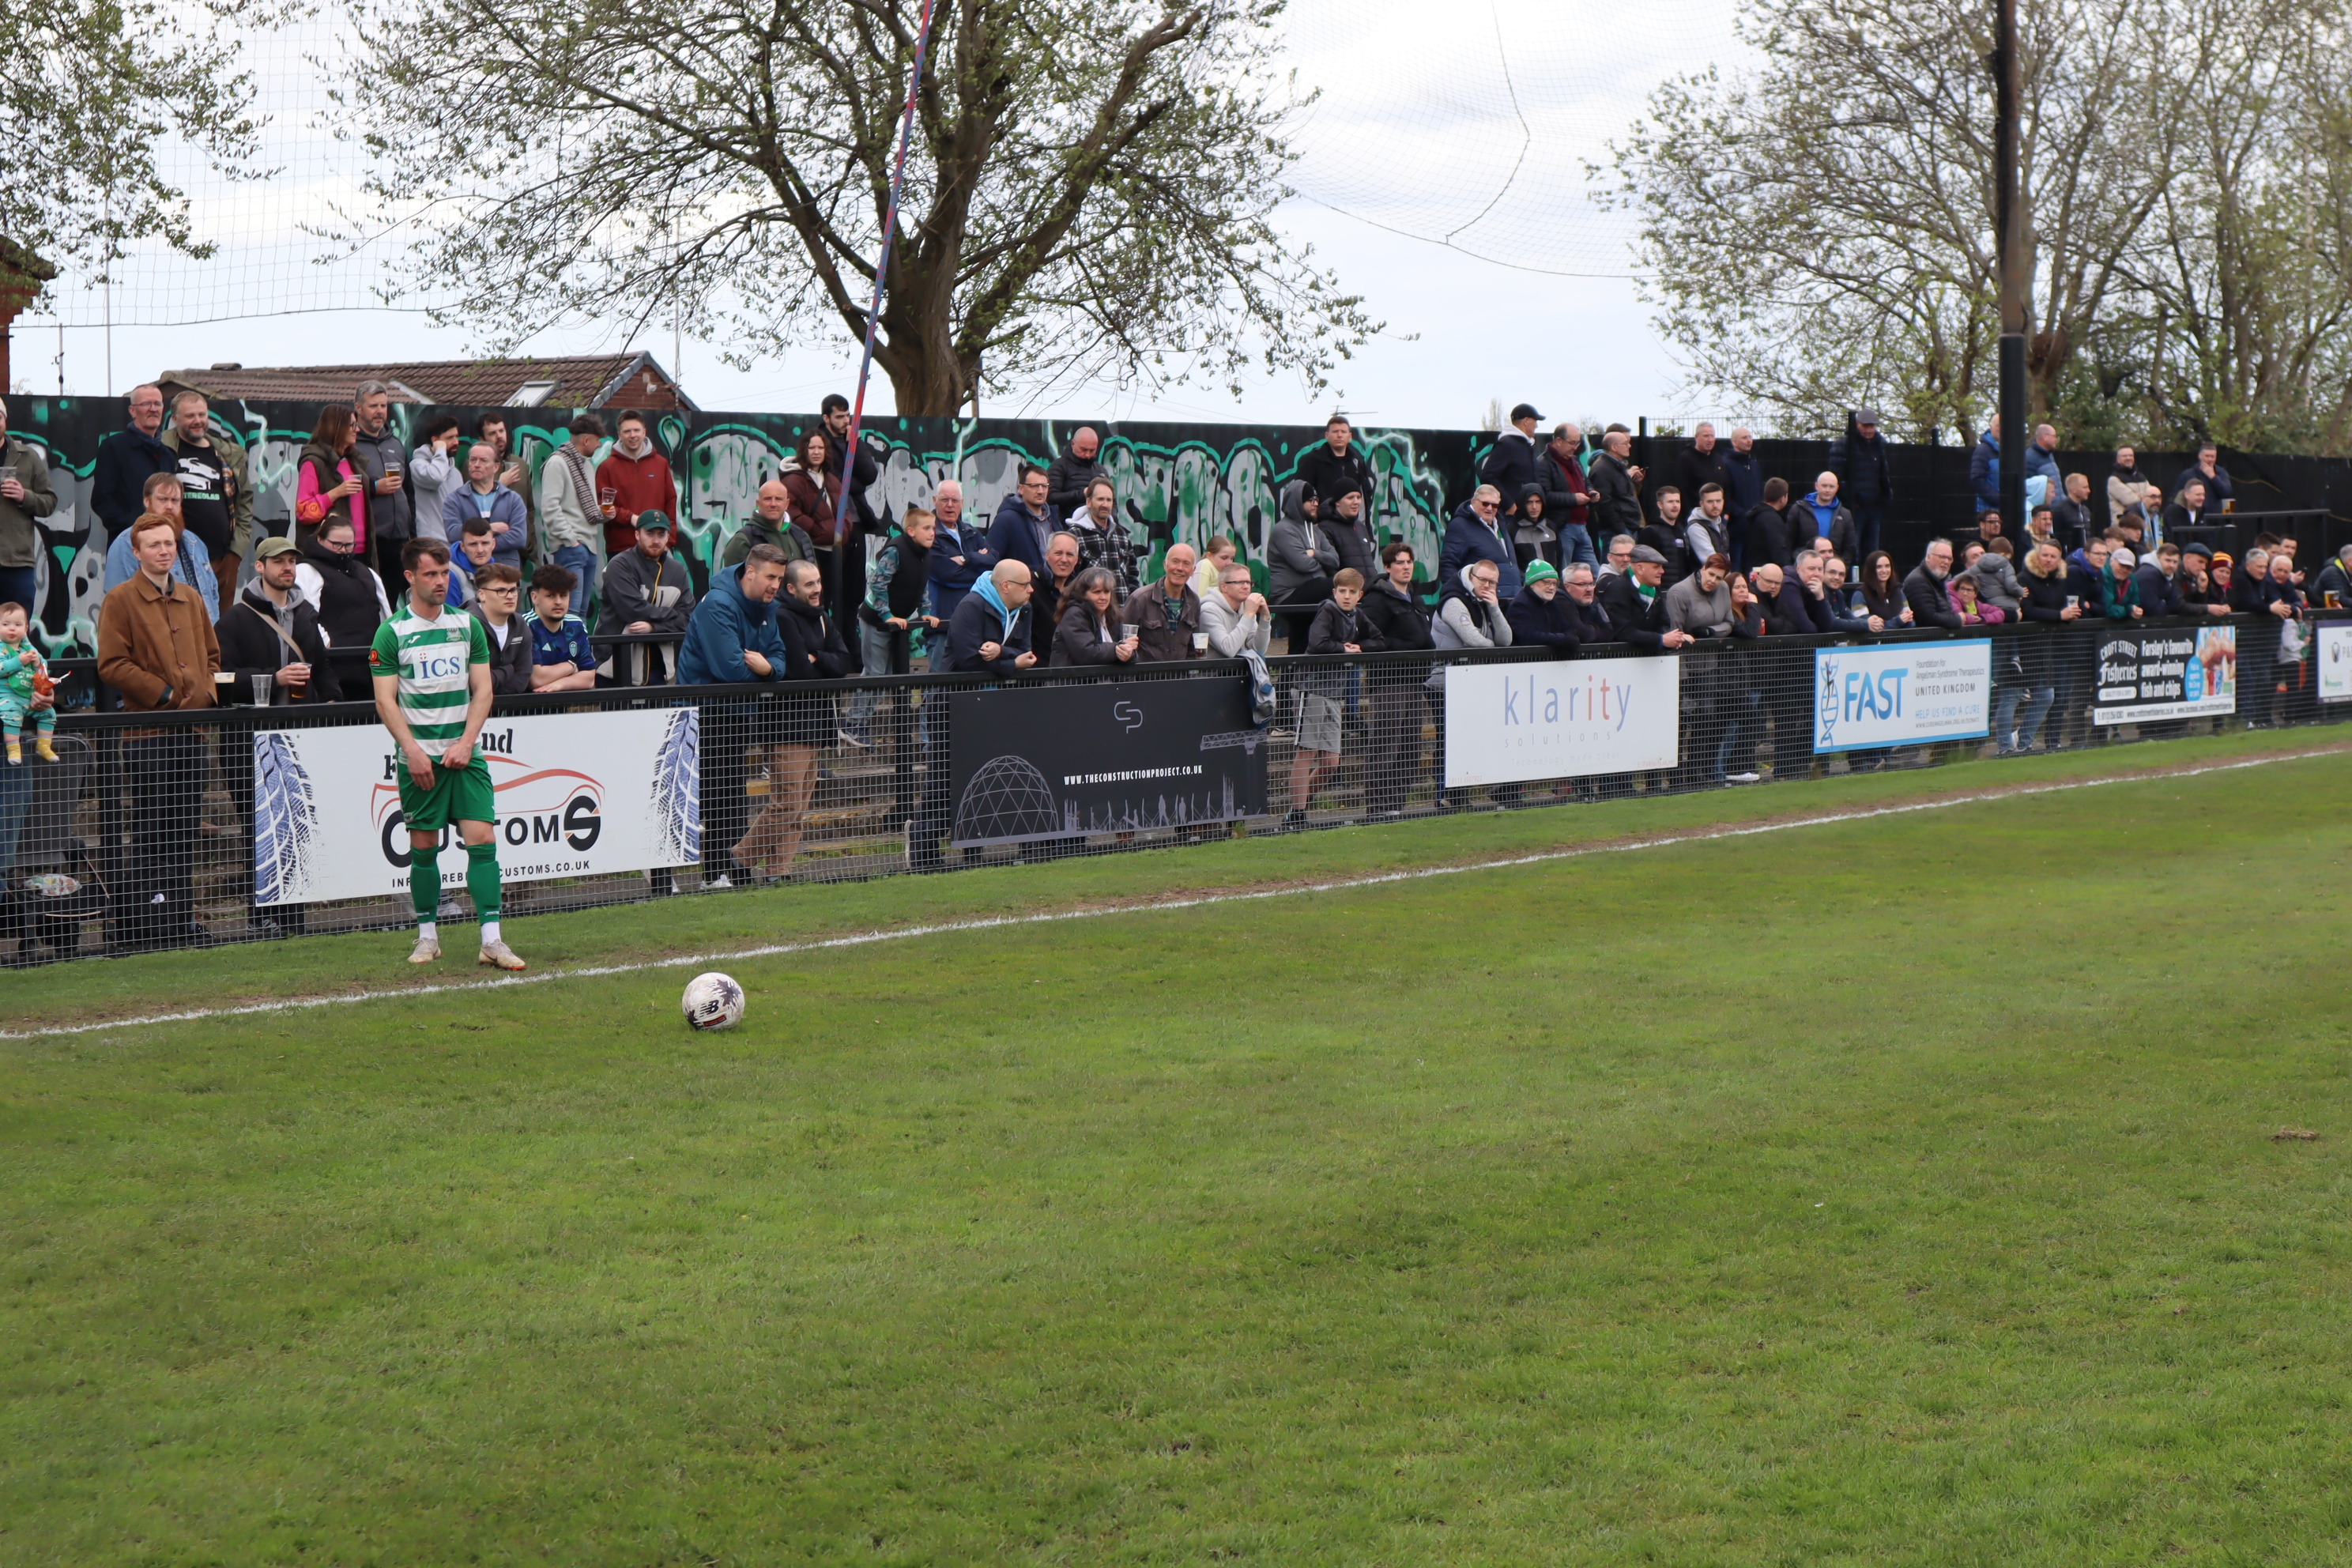
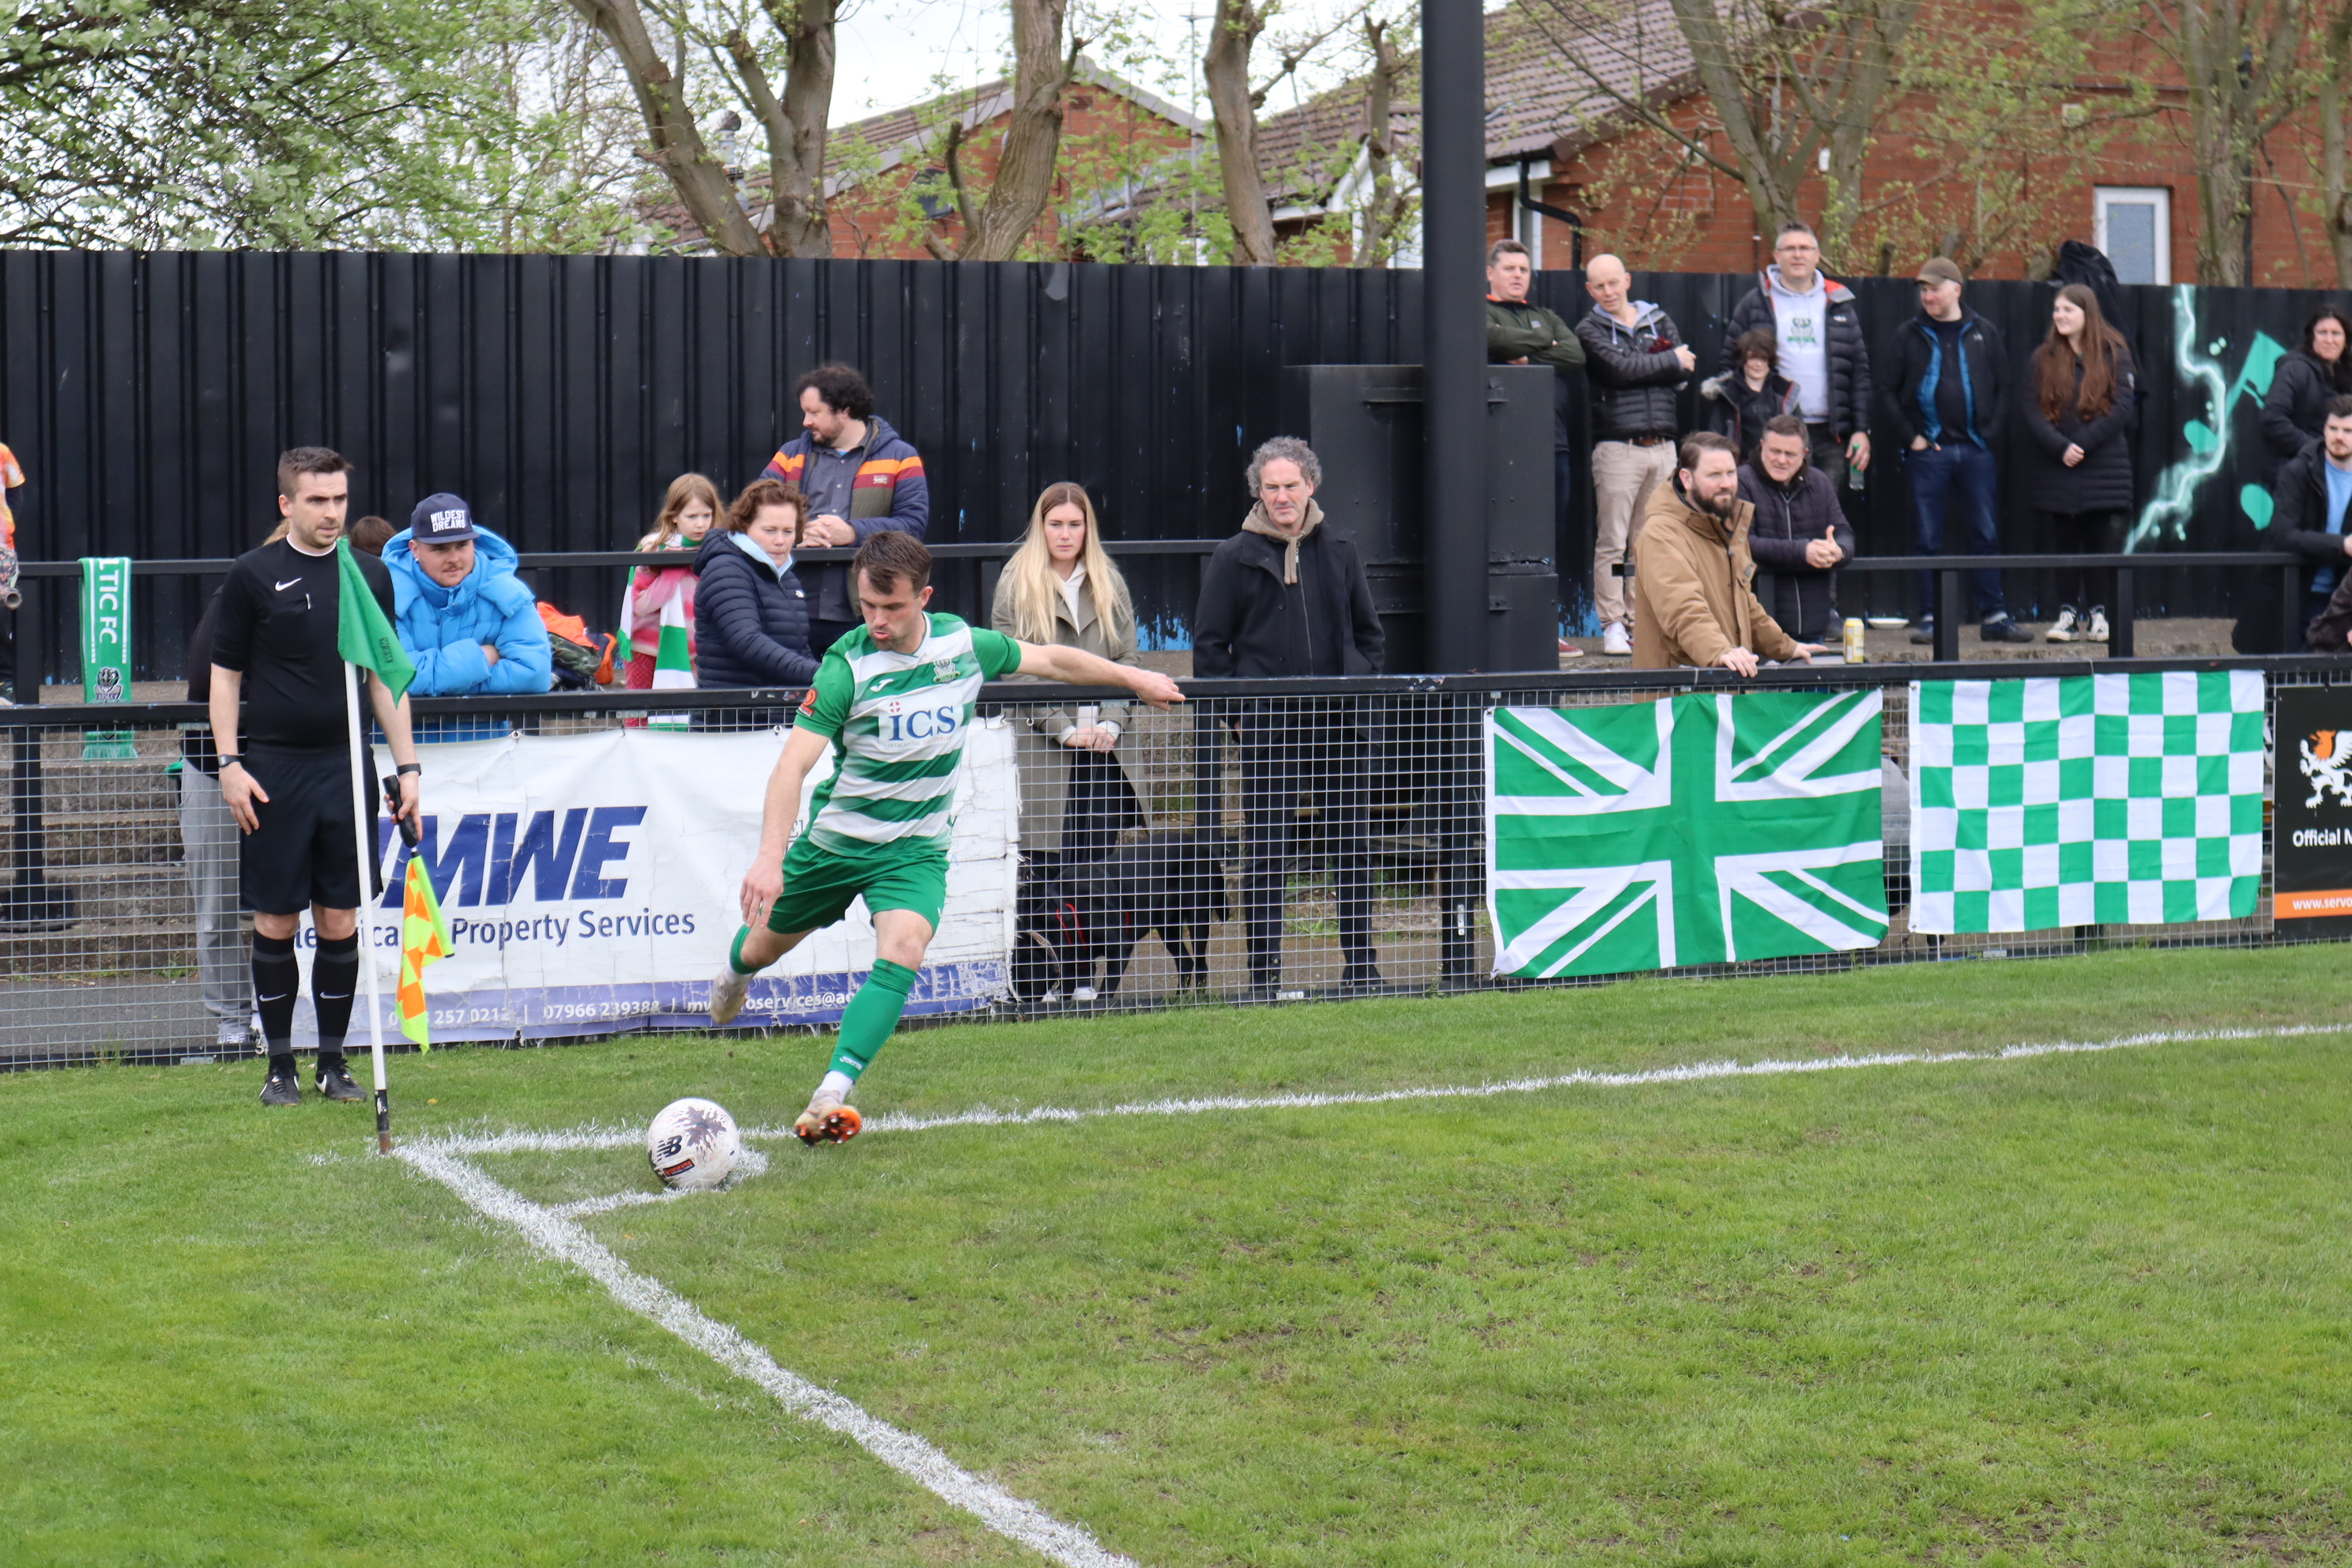
As I mentioned right at the start of this post, the fact I had a camera and was pitch side allowed me to attempt to get some action shots. Below are a few examples of some decent ones I captured.
These are a few decent actions of the players celebrating and one about to take a corner.
However, below are a few that came out blurry. As I still getting to grips with using the camera I rented, it made it tricky to select the correct shutter speed setting in time to photograph what I wanted to capture leading to me missing a few good picture opportunities which was frustrating.
I was fortunate enough to be attending a game where if Farsley won and other results went their way, they would avoid relegation. Thankfully, they won 2-0 leading to a pitch invasion at the end which made for some good images such as these. I think the supporters on the pitch also helps to convey how much of a close knitted community Farsley is as a club which really fits the article I am currently in the process of writing.
So what’s my plan going forward in terms of shooting?
Unfortunately, Farsley don’t have any more games as their season has finished now for the summer. But they do still have a charity ‘legends’ game on May 5th. At that game I need to photograph John and Robert who I interviewed as well as them performing their matchday tasks and George is set to be playing on the supporters team so I will ask Karl if he thinks me getting some photos of George playing would be good for my project.
Furthermore, I will retake the images of the murals that I attached in a previous post with a camera this time to hopefully improve there quality for the assignment.
Practice for Ben as he prepares for his cup final. “Image by Sven Kucinic”A defender chases down a tricky winger as he runs down the wing. “Image by Jeffrey F Lin”Flats pictured at nighttime. “Image by Maria Lysenko”


You must be logged in to post a comment.