Today, this task helped me understand how different f-stop settings affect depth of field in photography. By experimenting with low, mid, and high f-stops, I could see how focus changes depending on the aperture setting.
Learning about the aperture and the depth of field allowed me to understand the correct situations to use the settings and what scenarios would suit them best.
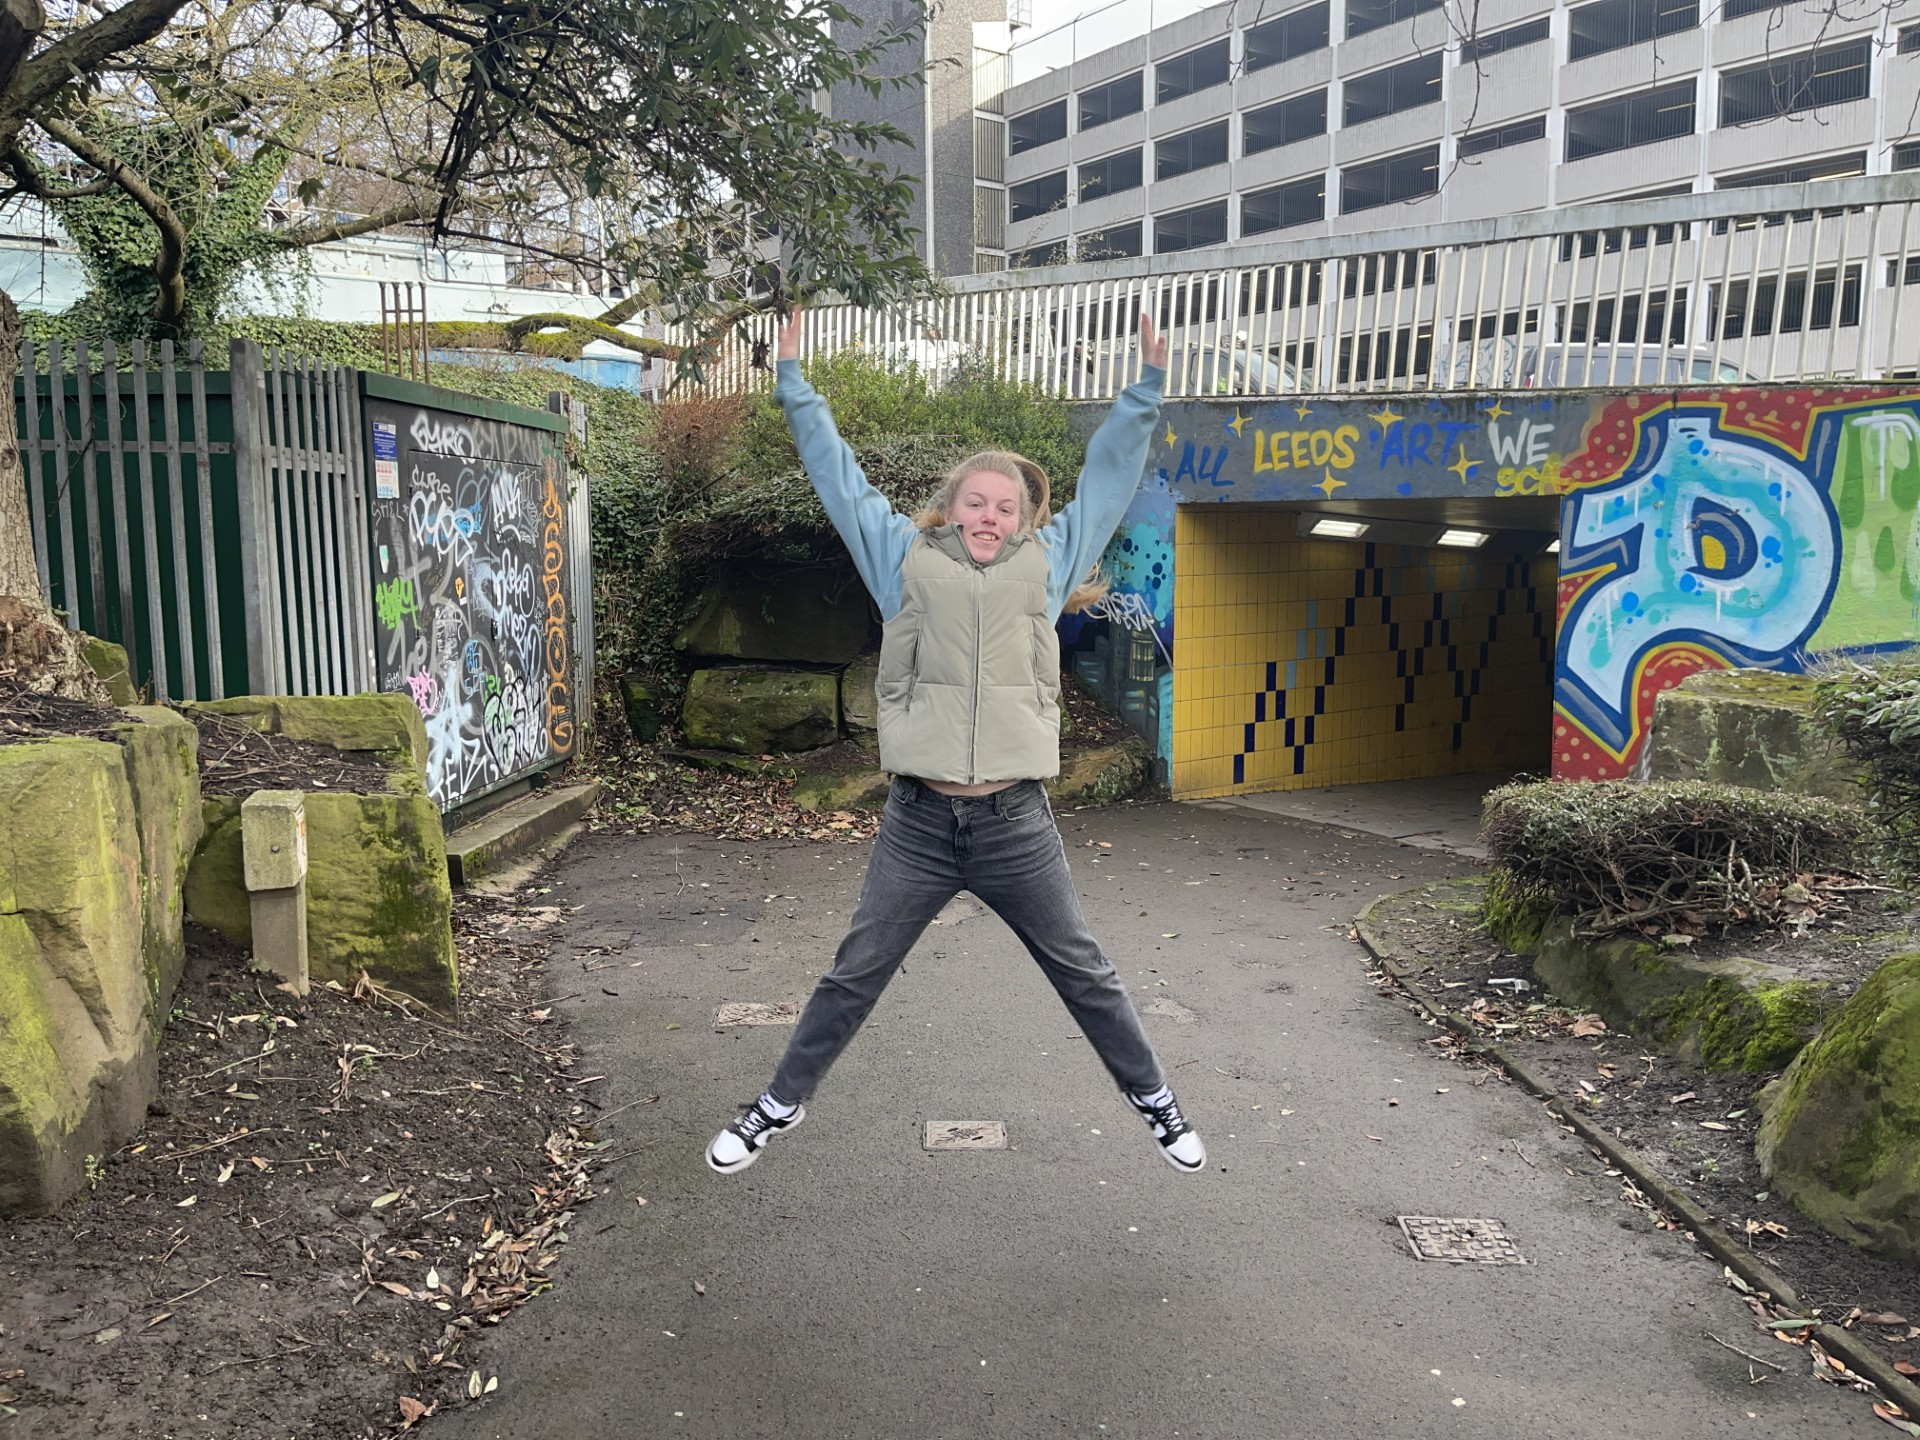
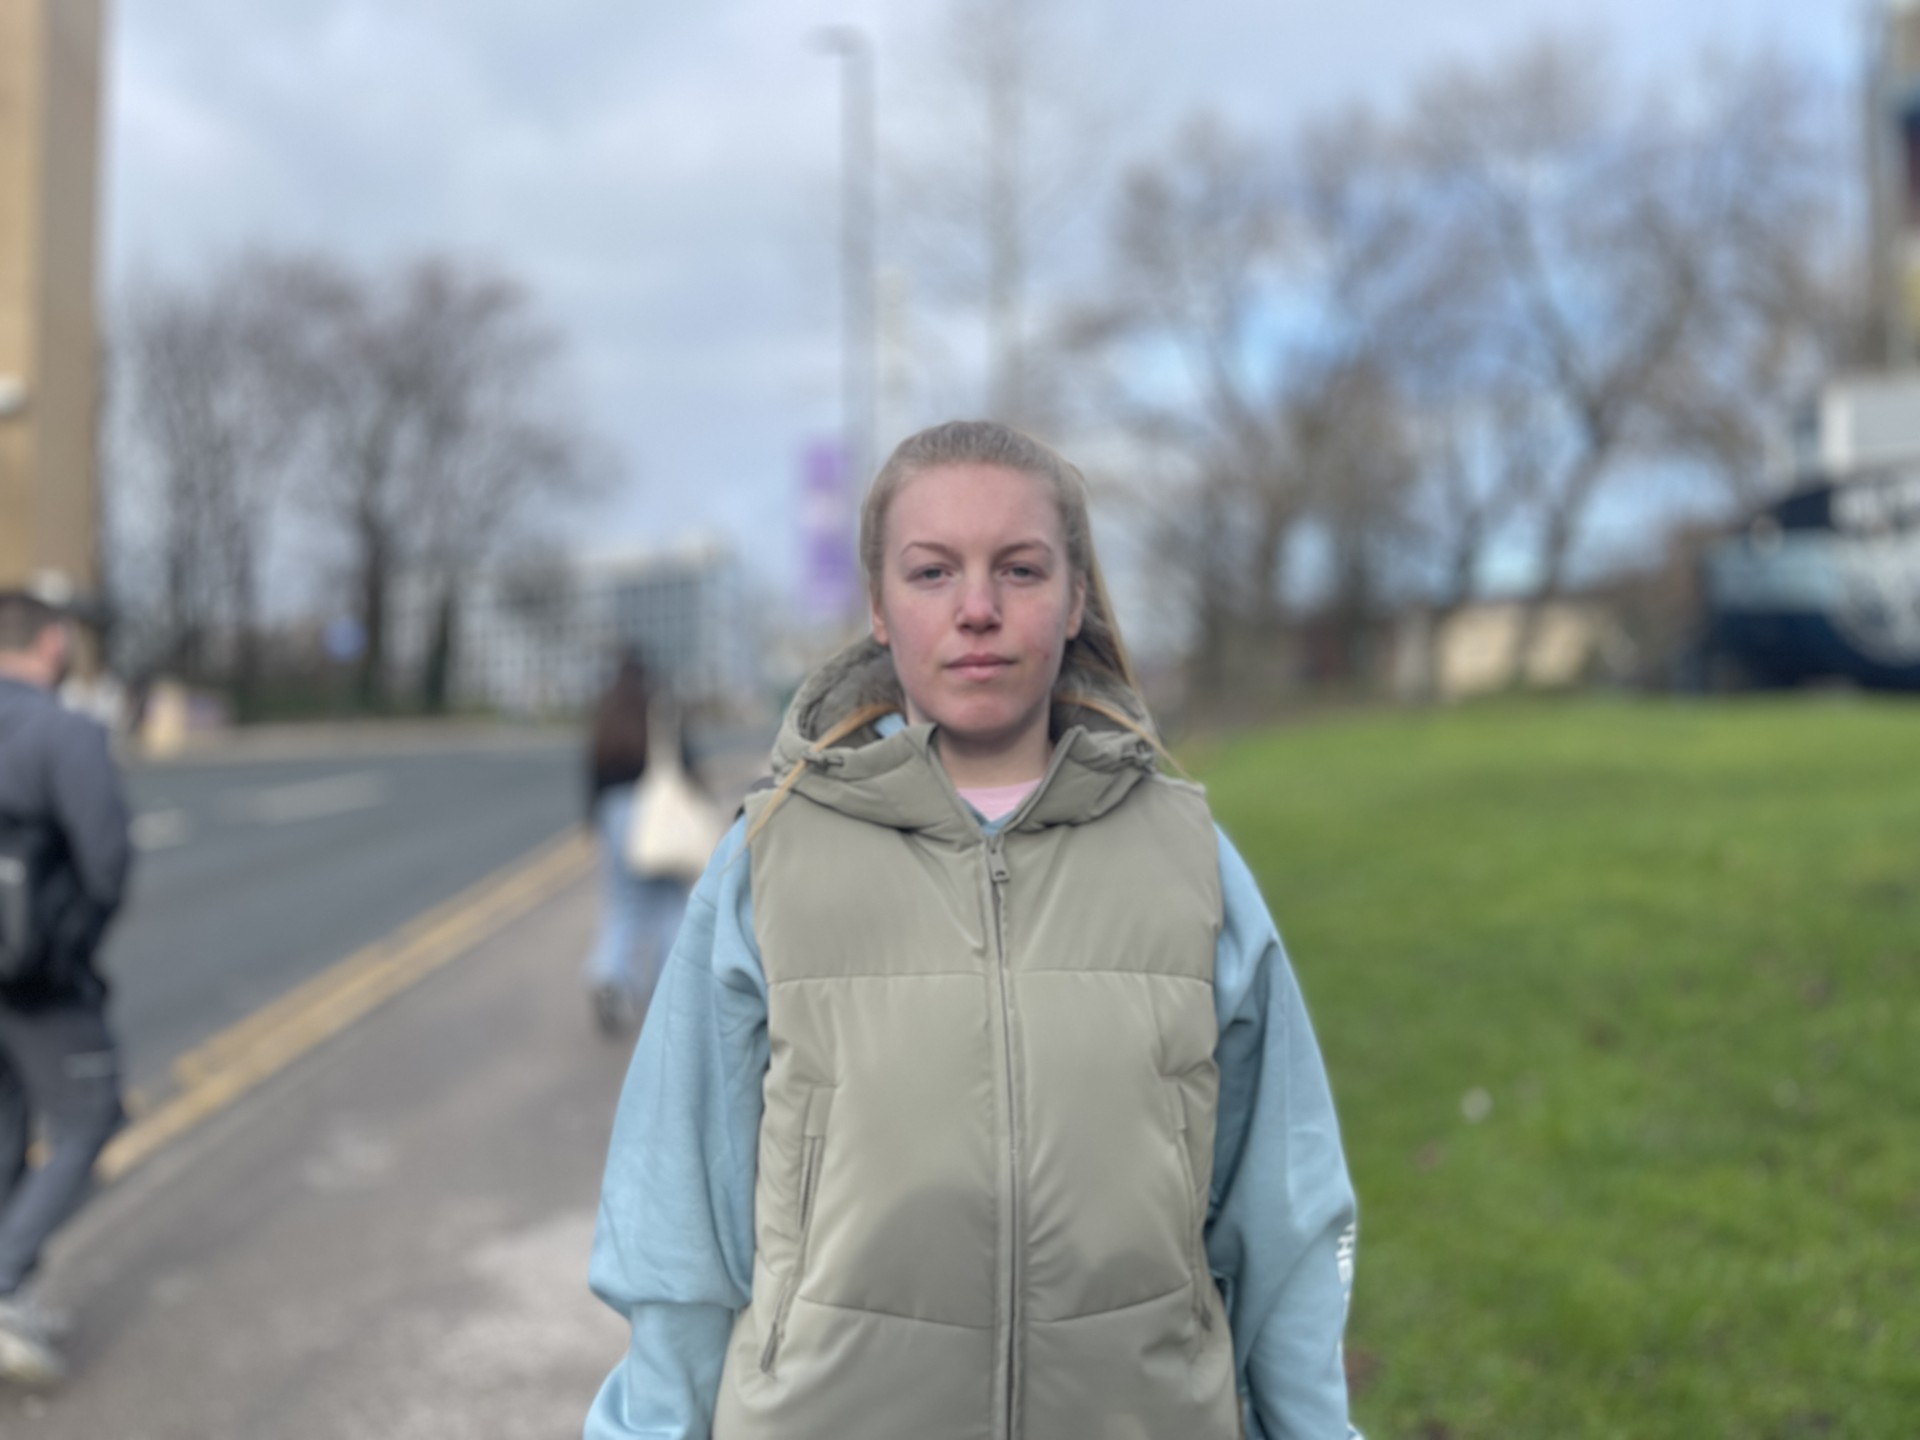
A low f-stop creates a shallow depth of field, making the background blurry while keeping the subject in focus. This is a common technique in sports photography, where the goal is to highlight a single player whilst having no distractions.
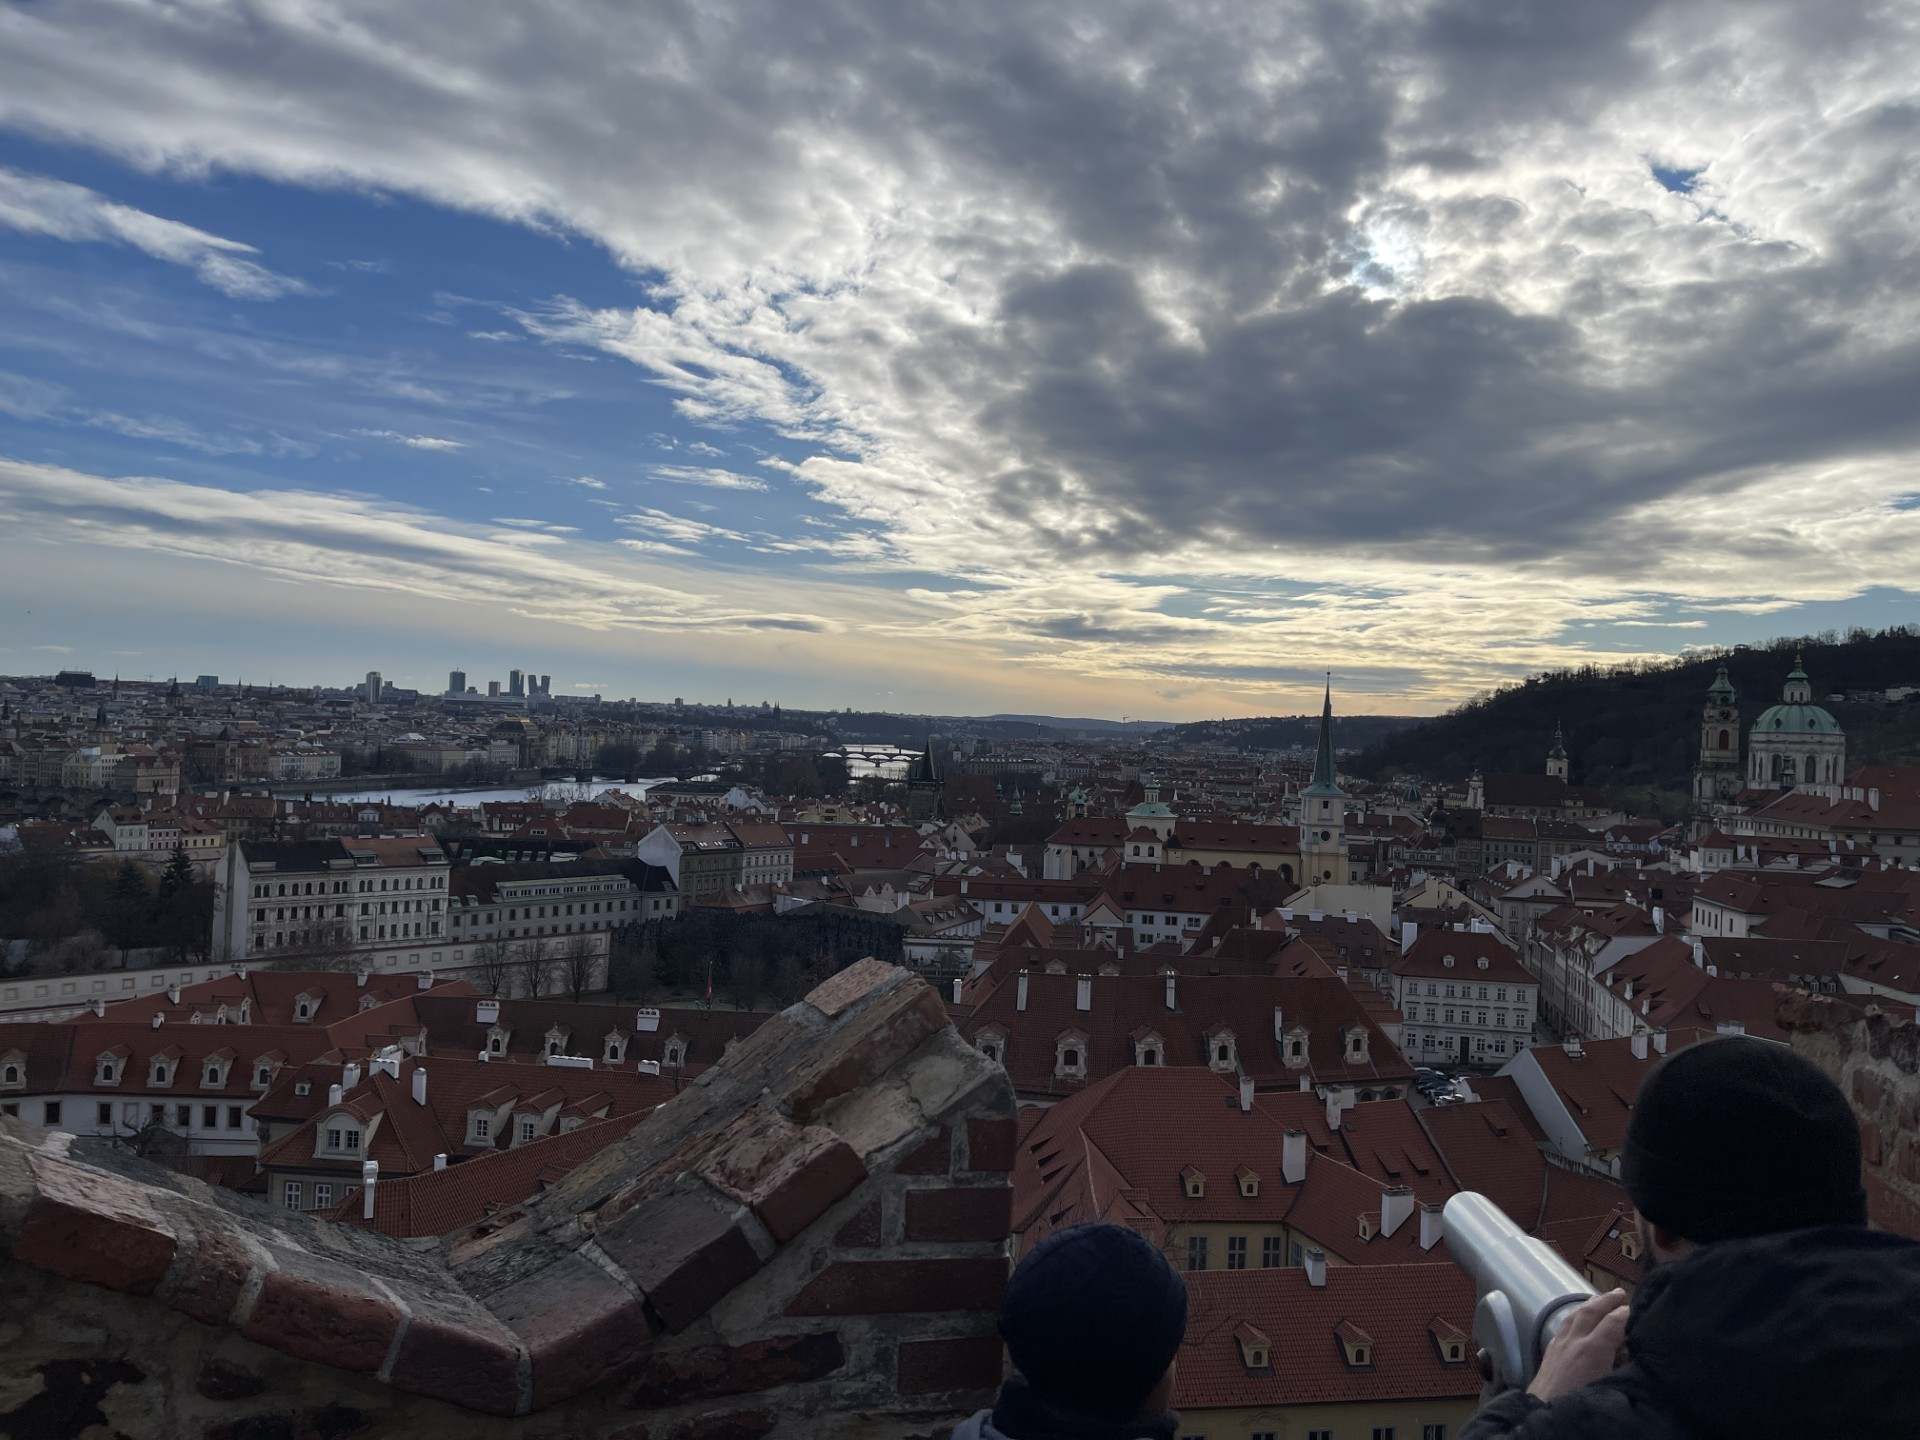
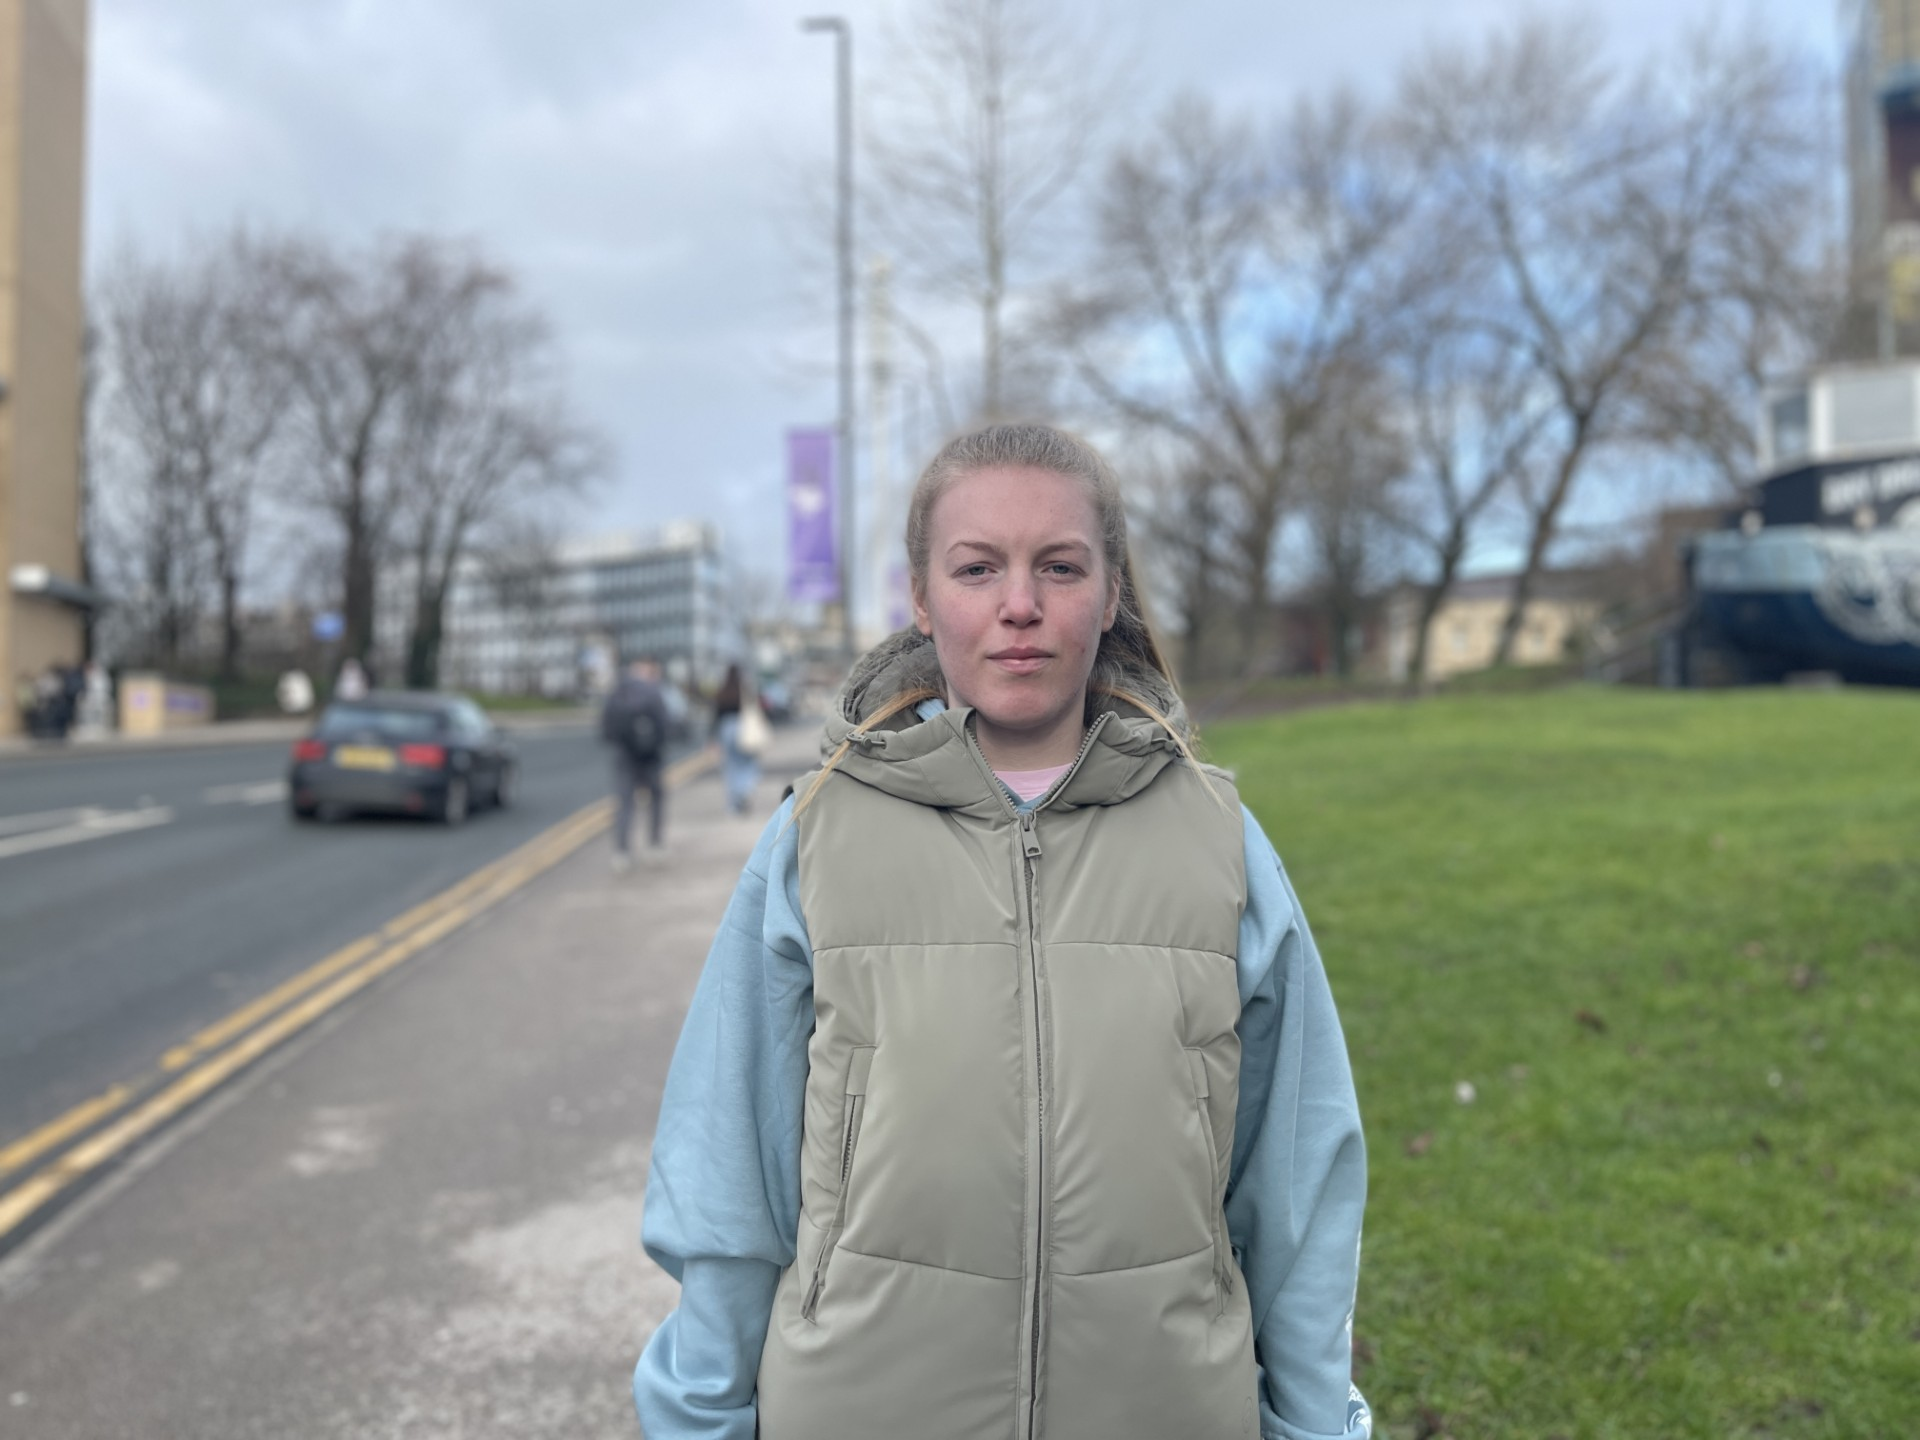
The second image showed a nice medium, meaning that people in the background have more specific detail to them, however not taking all the attention from the main centre piece. This experiment helped me realise how mid-range f-stops are useful for storytelling, as they provide more background detail while maintaining subject emphasis.
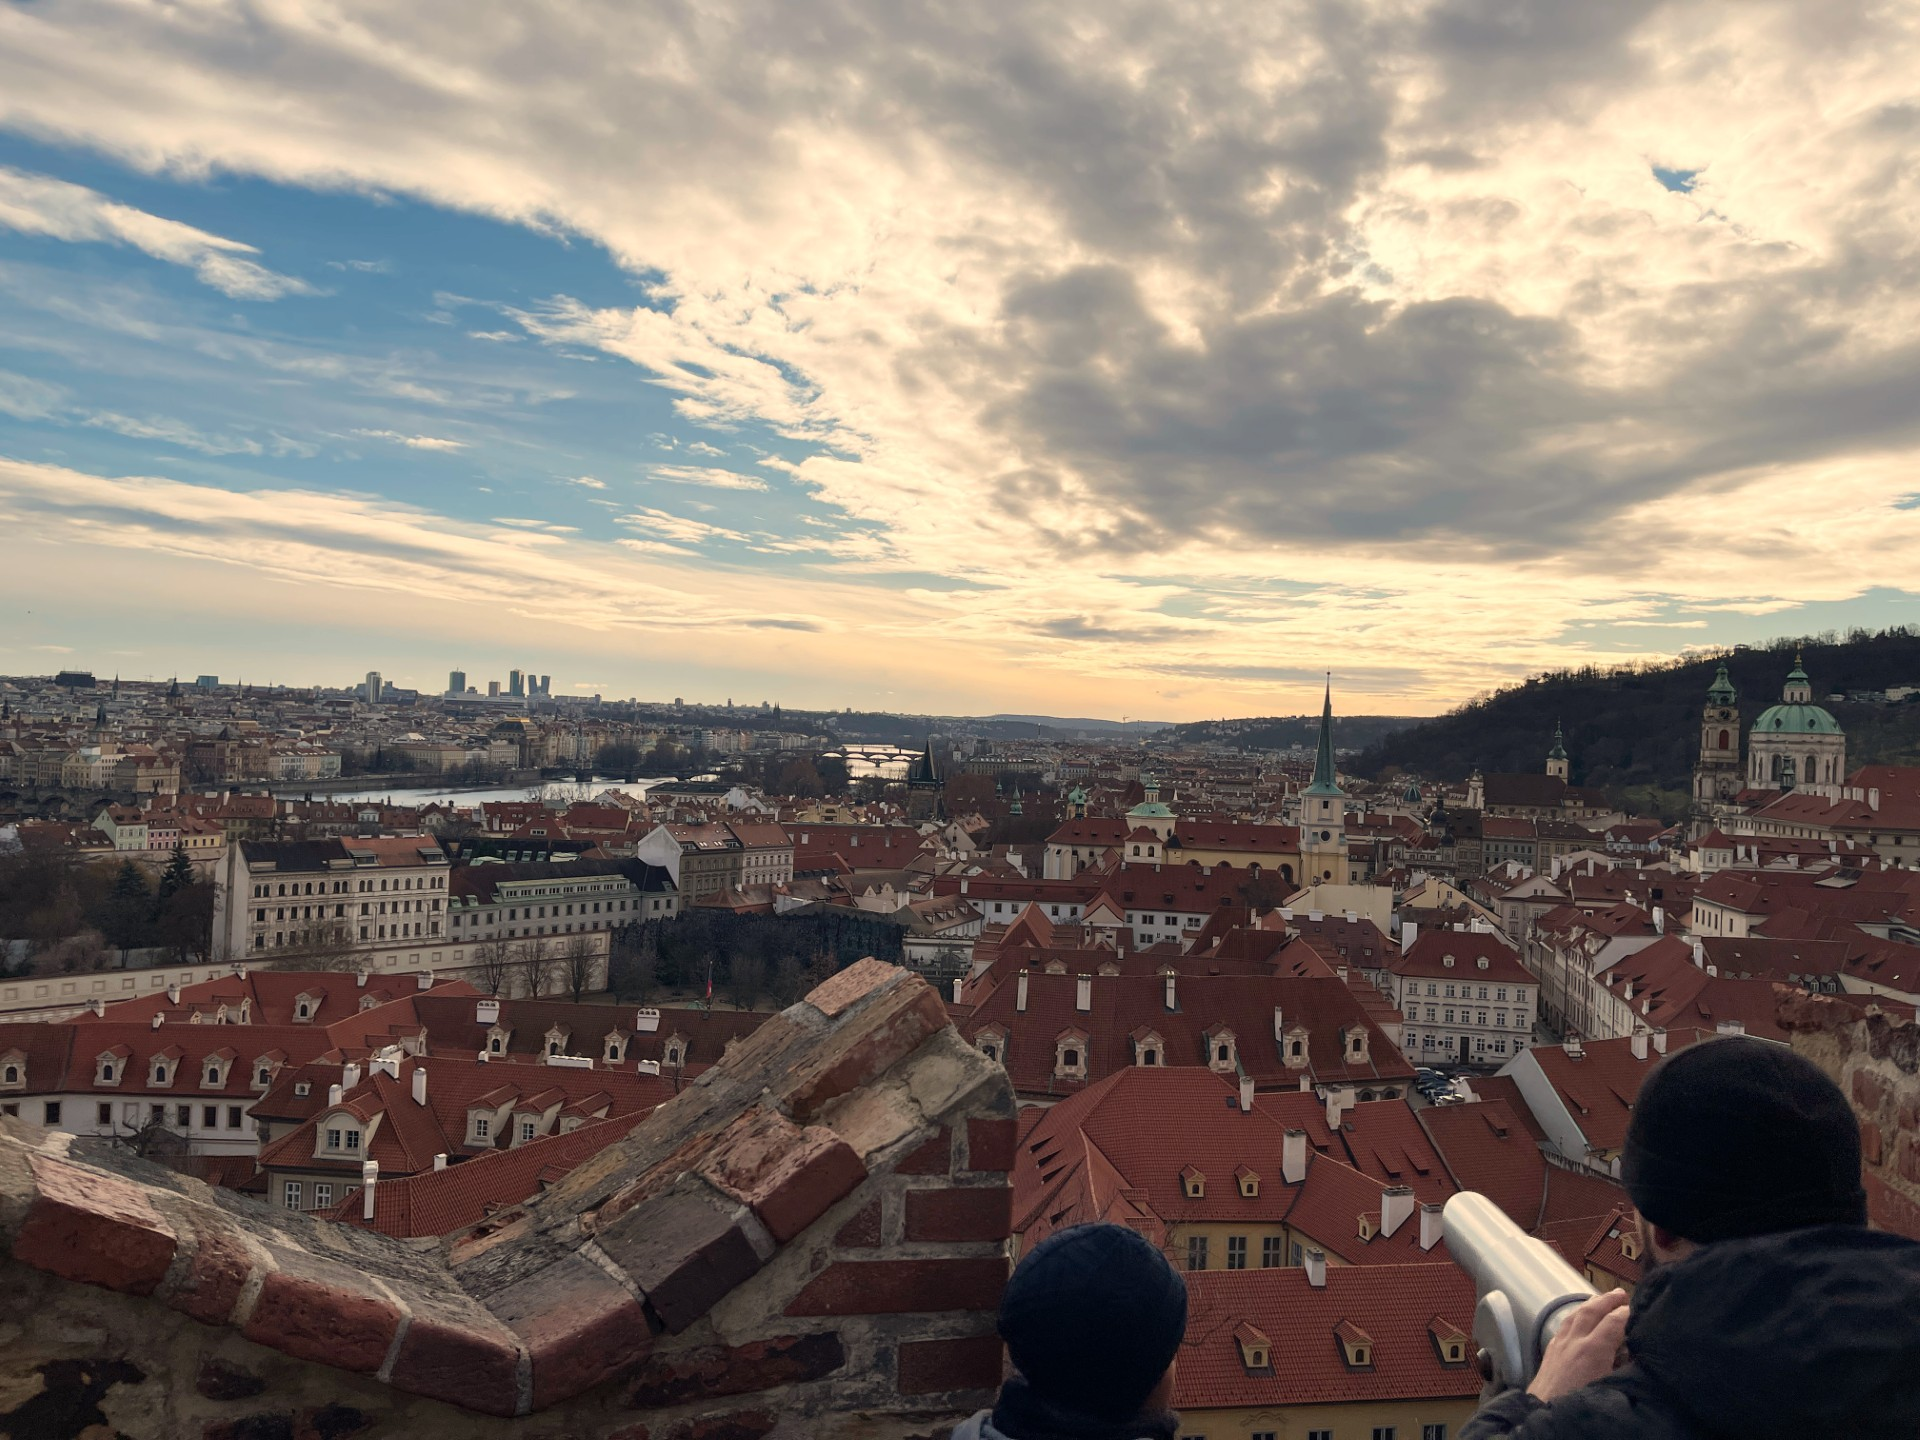
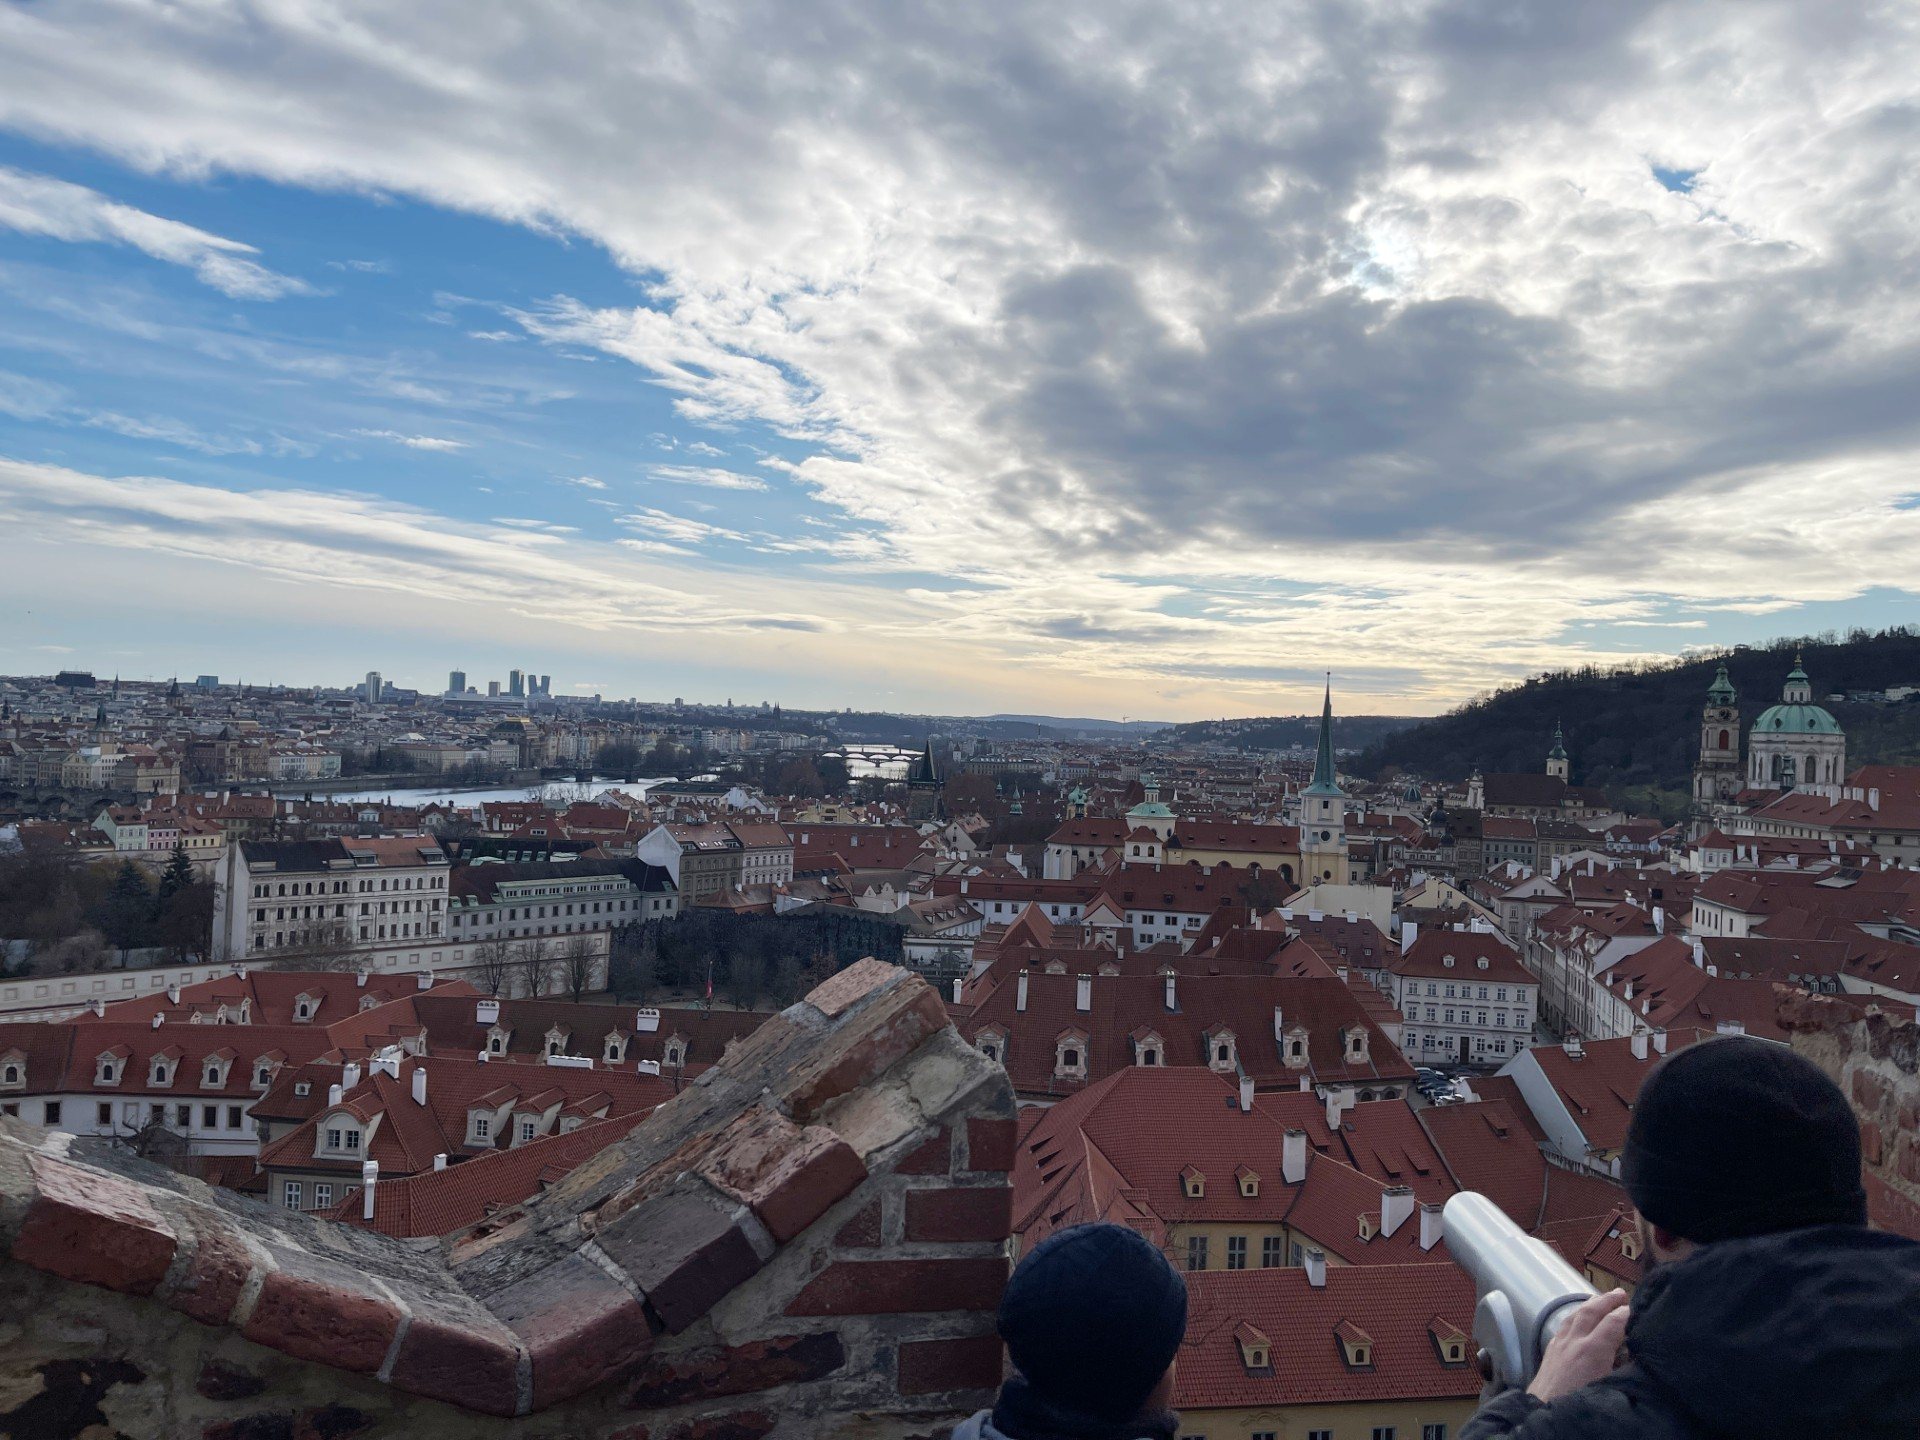
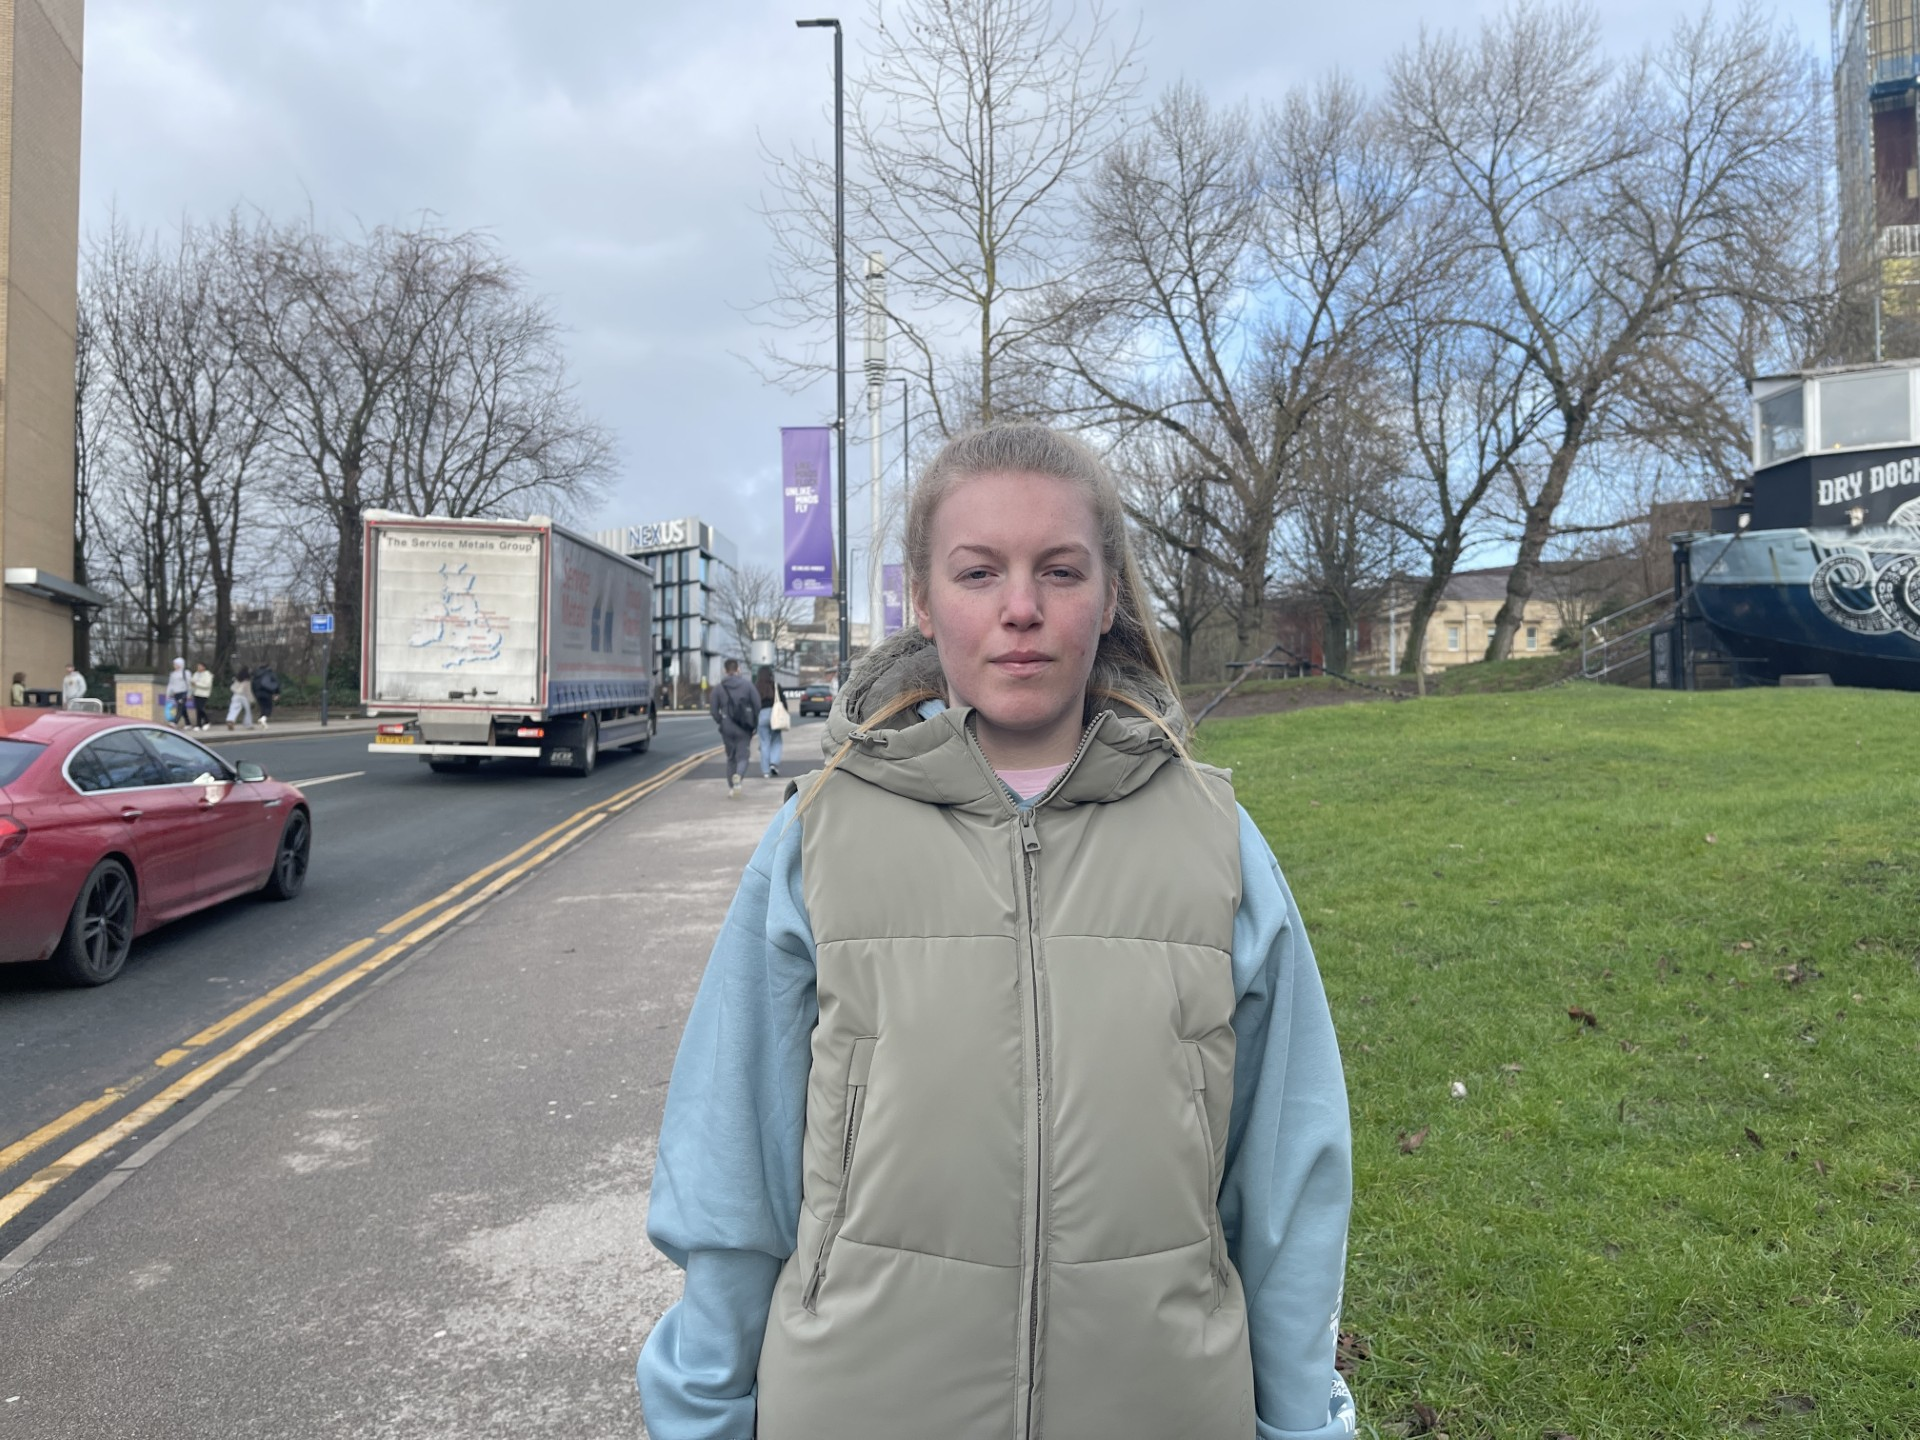
Finally the third image, taken at f.16, showed how a high f-stop results in everything being in focus. Unlike the previous shots, every detail, walls, lights, and people – had equal visual importance. This technique is useful for landscape and architectural photography, where capturing all elements clearly is essential. Mostly used for captivating serious moments such as war or desolate places.
In week 2 we explored the history of sports photojournalism, uncovering how it has shaped the way we view and understand sports. I learned about its origins in the late 19th century, starting with early pioneers who captured the excitement of live events through static images. The earliest examples of photojournalism go back to 1843 after photographers Hill and Adamson took a portrait shot of the tennis player Mr Laine in a studio.
As technology evolved, so did the role of sports photographers, adapting to new tools like color film, fast lenses, and digital cameras. Through this journey, we discovered how iconic sports images became central to storytelling in media.
This history was not just about the technical aspects but also about the ethical responsibilities of sports photojournalists. We discussed how images can influence public perception, inspire social change, or perpetuate certain narratives. The powerful impact of a well-timed photograph in sport cannot be overstated, as it often transcends the event itself and becomes part of cultural memory.
Learning about this history reinforced the importance of sports photojournalism and the shaping of history. It highlighted the deep connection between visual media and sports culture, showing how photography is more than just a form of media.
For week 5, our lecture was based around shutter speeds. We were made aware of the different ways that the shutter speed can affect your images and capture moments. As my topic will be around sports, I will need my shutter speed to be high as it can be essential for freezing action or conveying motion. A fast shutter speed, can freeze even the quickest movements, like a sprinter’s stride or a goalkeeper’s dive, showcasing the athlete’s power and agility in sharp detail.
However, using a slow shutter speed can create a creative spark within your photo. This means you can have a blurred background from a certain movement of the athlete conveying the imagery of speed or powerful movement. The changing of the shutter speed can really elevate the image and is a tool that the best photographers master.
By adjusting shutter speed, photographers can capture both precise moments and the intensity of motion, offering greater artistic expression and storytelling.
Week 6 consisted of working and understanding colour correction for final production. This skill is essential for multiple reasons. Ensuring visual consistency, enhancing the mood of an image and most importantly, giving a high quality image a polished look.
We acknowledged that colour correction can fix issues within photos, make them become more bold and establish what it should look like opposed to what it does.
These steps and processes are so important to photography. Proper colour treatment ensures that there is a clean and precise look – subtle changes make it look all the more better.
Working with my St Louis Blues picture was hard, i wanted to bring out the blue and yellow which is so iconic with the Blues presence. However, whilst enhancing these colours, the ice rink started to go yellow.
These mistakes are good to learn now as i can work around it and attempt to keep the bold colours but in a way where it still keeps its subtle look.
As this was our first workshop for photojournalism, Karl was laying down the fundamentals of the module and allowing us to grasp the idea of the grades and what is required to succeed.
We learned about the different components and percentages with our assignments. The shutter speed and camera settings were all mentioned as something we can learn later in the module.
To start off our workshop activity we were given the opportunity to go out into Leeds city centre and take pictures and capture moments that could build into an interesting story. Before going, we were told to check certain things.
No dust on glass lens
Always shoot landscape
Take plenty of pictures
After knowing this, I went to the Hedley Verity to find out what the local Wetherspoons means to them. This gave me some nice stories with different aspects of life. I spoke with those who work there, a elderly couple who are regulars and a young man who comes whenever he needs to kill some time and socialise with mates.
This idea came from wanting to know how ‘Disco Spoons’ for students on a Saturday helps other people who live day to day.
Overall, it was a good start to photography journalism. Learning the content of the module, the grading and finally our first task puts me in good stead for the final term.
Week 2:
In week 2 we explored the history of sports photojournalism, uncovering how it has shaped the way we view and understand sports. I learned about its origins in the late 19th century, starting with early pioneers who captured the excitement of live events through static images. The earliest examples of photojournalism go back to 1843 after photographers Hill and Adamson took a portrait shot of the tennis player Mr Laine in a studio.
As technology evolved, so did the role of sports photographers, adapting to new tools like color film, fast lenses, and digital cameras. Through this journey, we discovered how iconic sports images became central to storytelling in media.
This history was not just about the technical aspects but also about the ethical responsibilities of sports photojournalists. We discussed how images can influence public perception, inspire social change, or perpetuate certain narratives. The powerful impact of a well-timed photograph in sport cannot be overstated, as it often transcends the event itself and becomes part of cultural memory.
Learning about this history reinforced the importance of sports photojournalism and the shaping of history. It highlighted the deep connection between visual media and sports culture, showing how photography is more than just a form of media.
Week 3:
For week 3, we learned all about image construction. We took the time to understand how an image is constructed from it’s placement, background inclusion, what does the photo portray and can it be misconstrued.
We took 3 different pictures from the internet and detailed them in how they can be understood. The Ronaldo contract picture gave us an insight to a how images are carefully put together – not just to share news but to promote brands and create excitement. The way he looks serious but slightly happy adds to the message.
The second picture was about Sharbat Gula. Her expression tells a powerful story about the struggles of refugees. It proves that photos aren’t just pictures; they make people feel things and can even change how the world sees an issue. Showing that a candid photo can mean so much more than a constructed photo.
Finally, the third photo was a controversial meaning that can be misconstrued. The debate over the black and blue vs white and gold dress is another good example. It shows that people don’t always see the same thing, even when looking at the exact same image. It’s interesting how lighting, context, and personal perception can completely change what people think they’re seeing.
Overall, this has made me more aware of how images can be used to tell stories, influence opinions, and even cause debates. Whether a photo is factual or open to interpretation, it always has some kind of impact.
Week 4:
Today, this task helped me understand how different f-stop settings affect depth of field in photography. By experimenting with low, mid, and high f-stops, I could see how focus changes depending on the aperture setting.
Learning about the aperture and the depth of field allowed me to understand the correct situations to use the settings and what scenarios would suit them best.
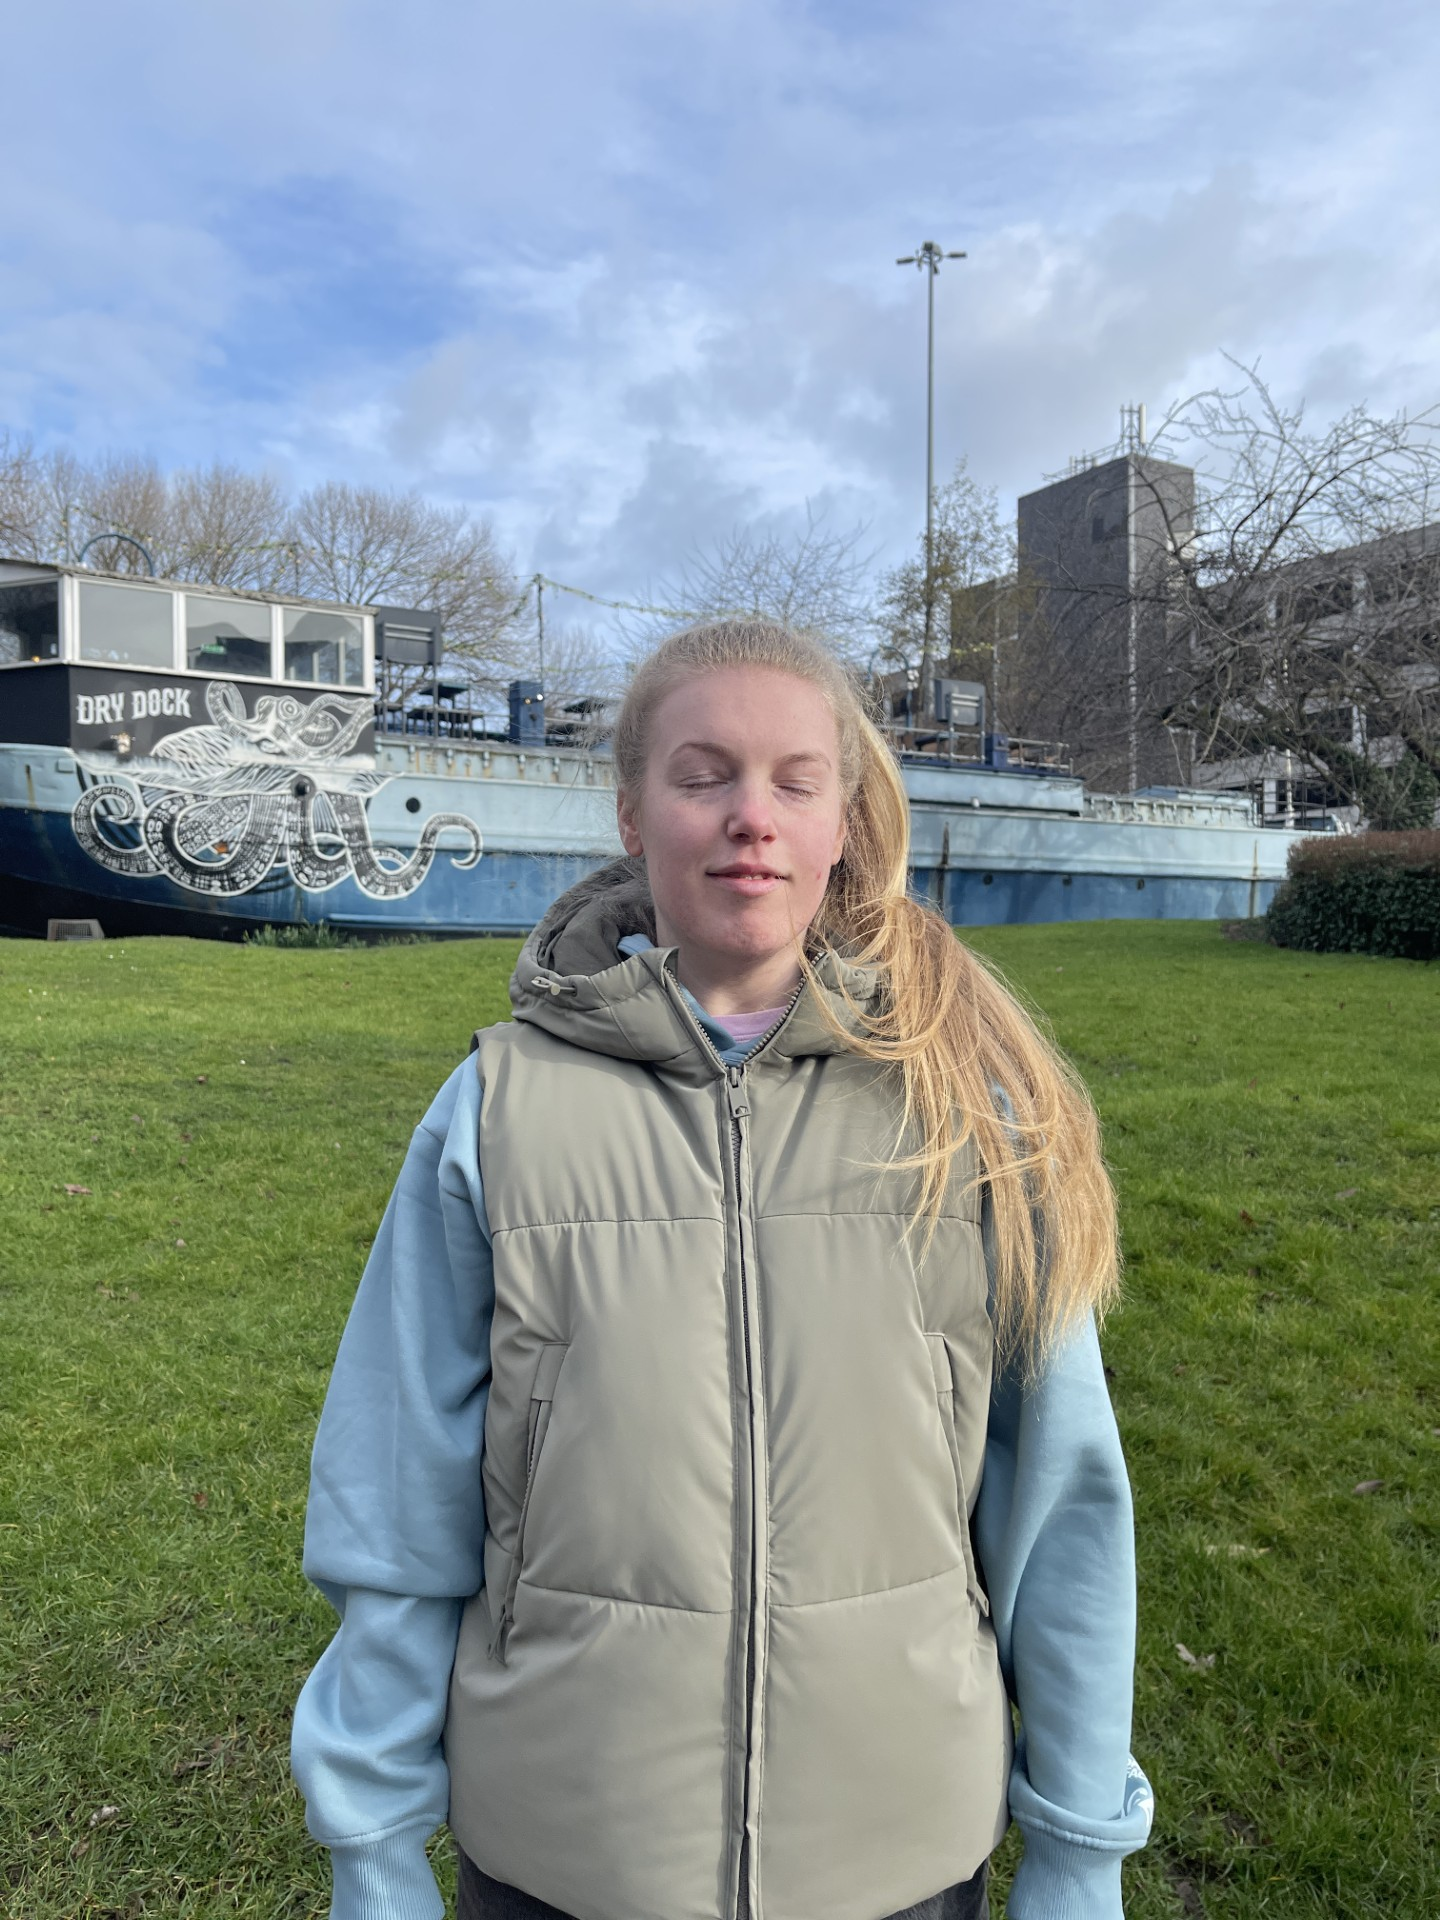
A low f-stop creates a shallow depth of field, making the background blurry while keeping the subject in focus. This is a common technique in sports photography, where the goal is to highlight a single player whilst having no distractions.
The second image showed a nice medium, meaning that people in the background have more specific detail to them, however not taking all the attention from the main centre piece. This experiment helped me realise how mid-range f-stops are useful for storytelling, as they provide more background detail while maintaining subject emphasis.
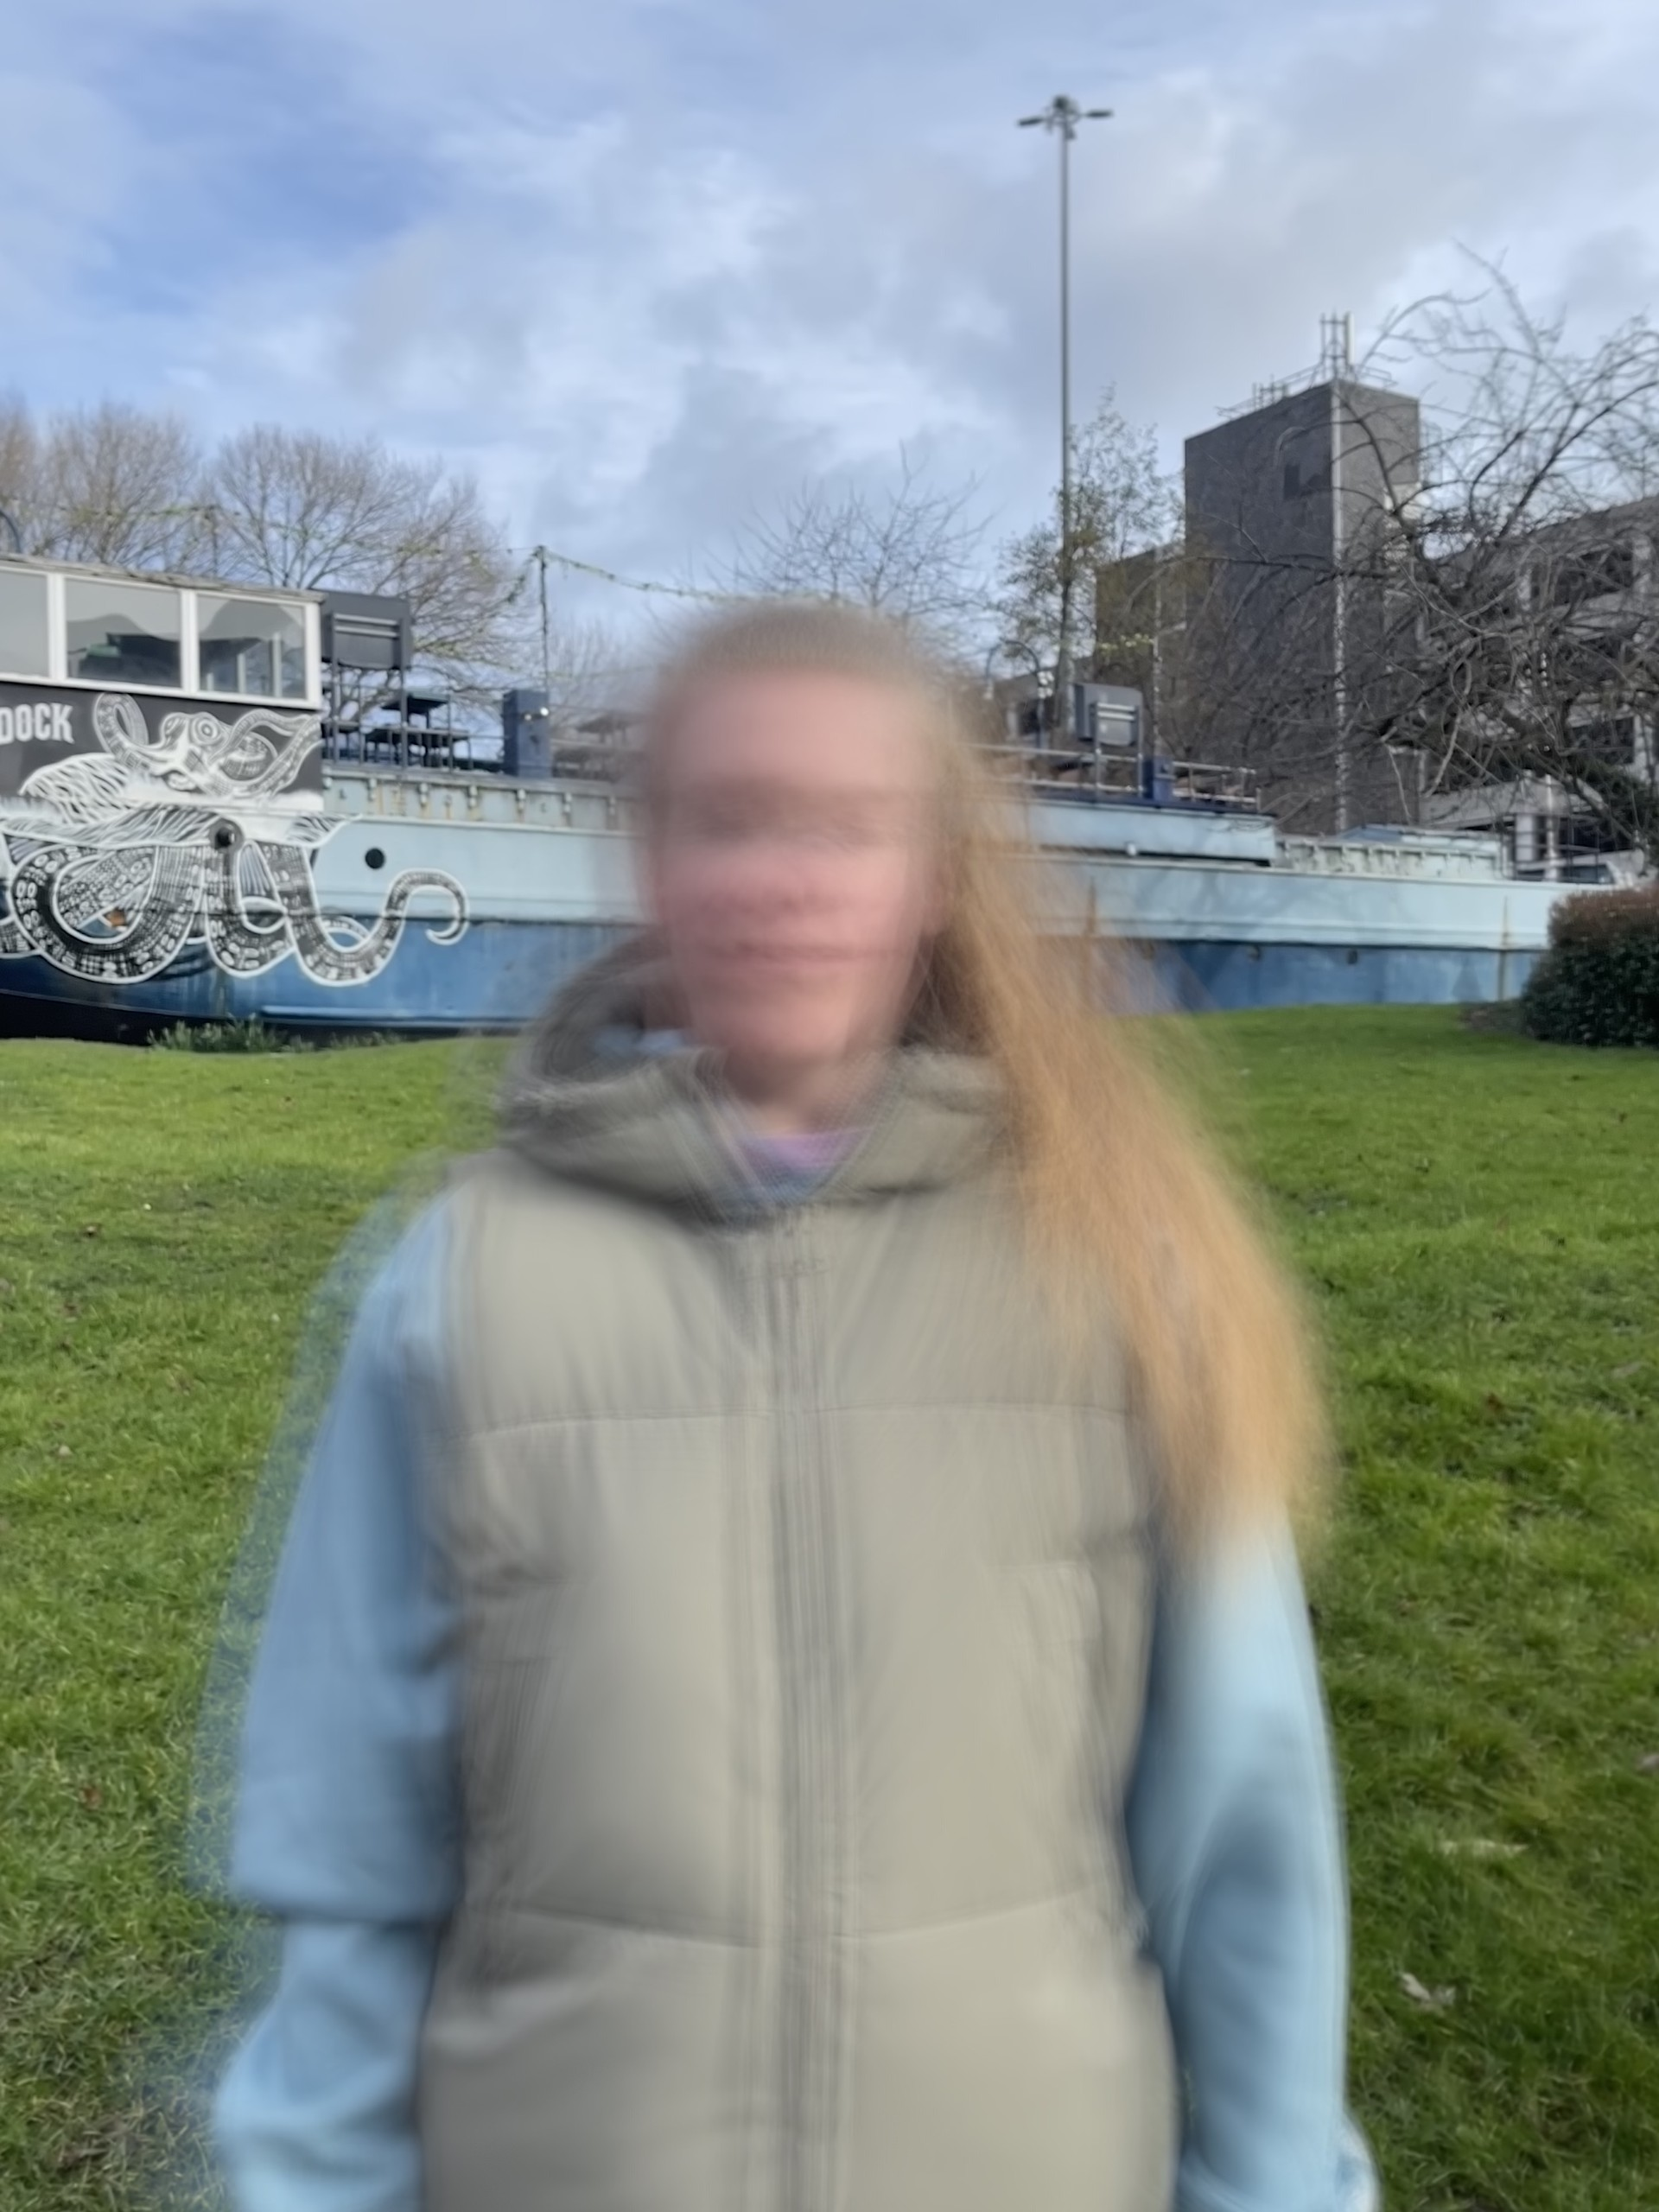
Finally the third image, taken at f.16, showed how a high f-stop results in everything being in focus. Unlike the previous shots, every detail, walls, lights, and people – had equal visual importance. This technique is useful for landscape and architectural photography, where capturing all elements clearly is essential. Mostly used for captivating serious moments such as war or desolate places.
Week 5:
For week 5, our lecture was based around shutter speeds. We were made aware of the different ways that the shutter speed can affect your images and capture moments. As my topic will be around sports, I will need my shutter speed to be high as it can be essential for freezing action or conveying motion. A fast shutter speed, can freeze even the quickest movements, like a sprinter’s stride or a goalkeeper’s dive, showcasing the athlete’s power and agility in sharp detail.
However, using a slow shutter speed can create a creative spark within your photo. This means you can have a blurred background from a certain movement of the athlete conveying the imagery of speed or powerful movement. The changing of the shutter speed can really elevate the image and is a tool that the best photographers master.
By adjusting shutter speed, photographers can capture both precise moments and the intensity of motion, offering greater artistic expression and storytelling.
Week 6:
Week 6 consisted of working and understanding colour correction for final production. This skill is essential for multiple reasons, including ensuring visual consistency, enhancing the mood of an image, and, most importantly, giving a high-quality image a polished, professional look that stands out.
We acknowledged that colour correction can fix issues within photos, make them bolder, and establish what they should look like as opposed to what they initially do. Small adjustments in contrast, saturation, and white balance can dramatically alter the overall feel of an image, making it more engaging and visually appealing.
These steps and processes are so important to photography. Proper colour treatment ensures that there is a clean and precise look—subtle changes make a significant difference in refining the final output and ensuring a professional aesthetic.
Working with my St. Louis Blues picture was hard. I wanted to bring out the blue and yellow, which is so iconic with the Blues’ presence. However, whilst enhancing these colours, the ice rink started to go yellow, creating an unintended effect that distracted from the overall balance of the image.
These mistakes are good to learn now, as I can work around them and attempt to keep the bold colours while still maintaining a natural and subtle look. Understanding how different colours interact within an image is crucial, and learning to balance enhancements without compromising other elements will be invaluable in future projects.
Week 7:
This week was focused around the use of cropping pictures and adding the best ratio dimension to a photo. Cropping is more than just cutting out unwanted parts—it’s about enhancing the subject, improving balance, and ensuring the photo effectively conveys its intended message.
One of the key takeaways was learning how different aspect ratios affect visual storytelling. For example, a 16:9 ratio works well for widescreen and cinematic shots, while a 4:5 ratio is often more suitable for social media platforms like Instagram. Choosing the right dimensions can make a photo look more professional and engaging, ensuring it captures attention in the right way.
I also learned how cropping can help fix framing mistakes or emphasize key elements in an image. However, I had to be mindful of over-cropping, which can lead to a loss of important details or reduced image quality. Striking a balance between composition and resolution is essential.
Overall, this exercise showed me how small adjustments in cropping and ratio selection can significantly improve a photograph. Moving forward, I will apply these skills to ensure my images are well-composed and visually impactful.
Week 8 – Post production
My photojournalism final piece was dedicated to boxing. I wanted to capture the best and thrilling moments from GBM Sports’ night in Sheffield. Having worked for GBM Sports and Koby McNamara (who fought on the night), I was lucky enough to have full access to the perimeter. This allowed me to capture footage close enough to give it the realistic and emotive feel it deserves.
Shooting on my SonyA6400 was key for this, and learning how to use it correctly in this module has boosted my confidence in professional settings. From week one to week eight, I have developed skills with my f-stop and my shutter speed, all of which were key to bringing success into my work. One of the biggest tools that were perfected was my shutter speed, with boxing being such an explosive sport, I had to make sure I was not only in the right place, but I had a high shutter speed so I don’t create blur.
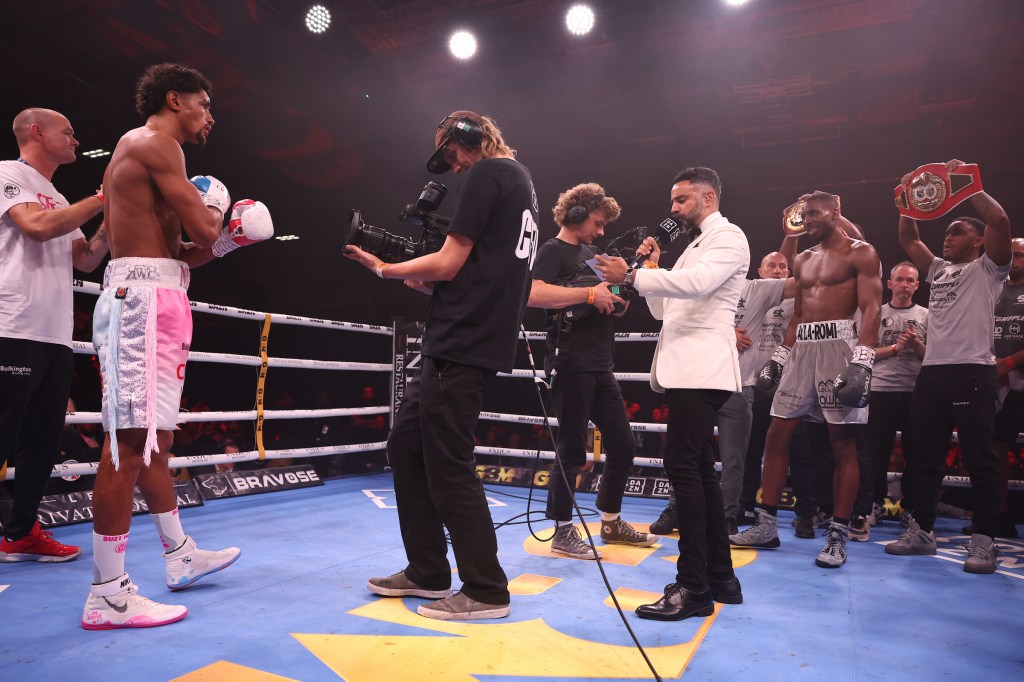
Due to GBM displaying a high quality event, it did mean that some pictures looked very busy; for example, there was a ring announcer, DAZN camera men, entourage and promoter Izzy Asif. This took the suspense out of the photo as it seemed to cluttered and there was no centre piece.
Although it gives people an understanding of how big the main event is, the audience may be confused as to where to look, this was not my intention and it was cut from my final piece as a result.
With the Canon Medical Arena being hosted by GBM Sports and televised on DAZN, I was very blessed as the lighting was perfect. It not only allowed me to capture the natural colours, it enhanced them due to the bright lights centred on the action. Of course, pictures were put into photoshopped and edited for post production quality, but it was not necessary to over do them, which I was very pleased with.
A good example of this was the blue and gold canvas, as through week six, I attempted to colour correct the yellow and blue of St.Louis Blues. This did not go that well during practice in week 6 as it made the white ice yellow, but through constant trying before the boxing event, I was able to manipulate it very well and keep the ropes white and the GBM canvas glowing.
GBM Sports Logo on ringSt. Louis Blues week 6 colour gradient mistake
When Koby fought, I wanted to get even closer as I work very well with him. Being his Social Media Lead, I wanted to create a picture that gives him all of the attention, therefore, capturing this before his fight was essential. I knew timing would be key, so I used high shutter speed and low f-stop skills taught to us in week four and five to capture him at the front as he is being announced. However, what I love most about this picture, is that his coach – Padraic Mcdonagh – is seen in the background just blurred with a low f-stop.
Koby McNamara seen front and centre with trainer blurred with low f-stop.
Another struggle was finding the right pictures to keep a flowing story. Although I was pleased with what was captured, there was some pictures that have been included purely based on the flow of my piece. For example, GBM’s biggest prospect is Taz Nadeem, due to his knockout power. Because of this, it was extremely hard to know how to keep him in shot when fighting. For my big ‘KO’ action shot, he isn’t facing the camera as he’s celebrating. Therefore, to allow people to understand who this superstar on the rise is, I have chosen to include his ring walk.
Taz Nadeem walks to the ringNadeem KO against Cieslack
Using colour correction and photoshop, I have made Nadeem a bit more defined with higher structure.
COO of GBM Sports Mitch Gostolo (left) with CEO of GBM Sports Izzy Asif (right)
Another example of storyline photographs is this one with CEO and COO, Izzy Asif and Mitch Gostolo. This picture was taken during the interval as the main card was to start shortly. I included this photo as an indicator of the end of the undercard and used it as valuable time to get my interviews / quotes and showcase GBM’s progression over the years.
Like the Nadeem walkout, it isn’t the best quality as the light can be quite overbearing, making the two participants dark, however it went well with my storyline and showed a clear beginning and end to the under and main card.
Saying this, I am very proud of the photos I took, I was challenged with a big event for GBM, Koby and my own photographic journalism module and I believe that I produced a high level quality of work.
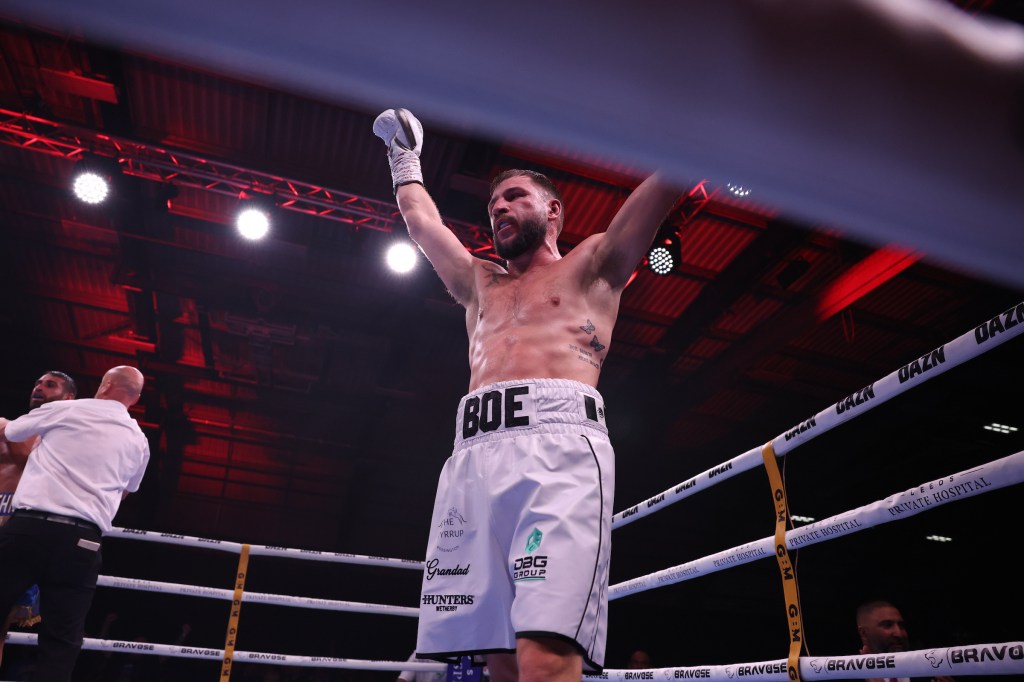
Maxi Hughes win
Perfect action shot, a different selective angle, from the bottom facing up, lights coming down on Maxi Hughes. In the background we see the fighter arguing with the ref and at the front Hughes has his hands in celebration. For me, my favourite as it captured everything a viewer would want to see.
Overall, with a full access to ringside and other parts of the event, I was very fortunate to be able to capture the images I did. I believe that my pictures were well constructed and showed a good variety throughout my written piece, paying close attention to colour grading, to enhance the impact of each image without over-editing. I had some problems throughout my work, but this was not unexpected. Using some pictures that helped my story flow was essential. Although it may have dipped the quality in picture selection, I am content with its inclusion to allow readers to understand the event well. I have realised not every image has to be the most polished – sometimes it’s the moment itself that matters more.
Week 1 – 27/01/2025 – In today’s workshop we were asked to go into Leeds City Centre and find a story. My first idea was to interview someone about the dangers of cycling in the City Centre and if road works can increase the threat. However, I soon found this challenging due to being unable to stop cyclists. I then walked past a vape shop and thought this could lead to a good story with the Vape ban coming soon. I spotted two men, one vaping and one smoking and asked for pictures and an interview, which they agreed to. This was daunting but I introduced myself and explained the project. Next time I would ensure I take a few more pictures and ask them the questions separately as they spoke over each other a lot. To make this more of a news story I could have asked more questions on what they actually thought of the ban. Overall I was very happy with my images and the angle of the news story.
Week 2 – 03/02/2025 – Today’s workshop covered different types of photography and allowed me to learn my options for my module assessment. Although I liked the look of fashion and studio photography my love for sport can’t be swayed. Therefore I have decided to shoot sports photography. Through the research task, I learnt a lot about sports photography. The main point is how adaptable you must be when shooting, the subject will never do exactly what you want. This means that preparation is key, you have to know where to shoot from. For example, my idea is to shoot images from Lisa Thornley’s training for the Ironman. To do this I must think about her training sessions and where would be a good place to stand for her to bike/run past me. However because this is training I may be able to ‘set up’ some photos, although I would rather capture candid, in-action photos. This week I learnt important information about my chosen photography genre.
Week 3 – 10/02/2025 – Today’s workshop was about finding examples of photos and looking at what the meaning was behind them and if the meaning was accurate. I found this task to be really interesting as it made me think about photos in more detail than I usually would. I thought about the set-up of each photo and how it is easy to tell when one has been set up no matter if you try to make it look candid. It also made me realise that a photographer may want the photo to portray a story in a certain way, however this can be disputed by the viewer/reader. Therefore, the photos I take must display the meaning I would like to get across. From looking into the stories I found that many news story photos are set up, which links to the week 2 workshop that sports photography is difficult because it cannot be set up at all. Overall this all links to candid and sports photography being difficult and the preparation for it must be good enough.
Week 4 – 17/02/2025 – This week’s workshop was on the basics of digital photography, looking at focus, aperture and depth of field. Learning what these tools meant and how they worked on the iPhone (which I will be using) was extremely helpful. All three elements work together to ensure the subject is focused on, it is sharp and the depth of the image is staged. When working on my project I took into account focus and how it can change an image. When an image is busy it is important to align the focus on what you want the reader to look at.
Week 5 – 24/02/2025 – I found this workshop the most beneficial as we investigated more of what an iPhone camera is capable of. We were sent to practice capturing pictures focusing on shutter speed using the iPhone features of ‘burst mode’. This helps to capture still images of moving subjects which is key for my project as I will be photographing sport. This is done by using a faster shutter speed. The opposite of this was to use ‘live photo’ to create a long exposure by using a slow shutter speed. This creates a blurred image which can be visually pleasing. However, this would need to be planned and the image would need to be conveying a story from the image. I have taken this week on board and plan to use them to capture the images for the project.
Week 6 – 03/03/2025 – This workshop focused on the post-production of taking an image. I found this really useful to know how to edit an image that just needs slight changes. I used an image which had a light sky while the rest of the image was too dark. I then had to balance the colours in the editing process to ensure the sky was not too light. At first, I took the editing too after and made the image too bright, this meant that the image lost its natural colour balance. When going back and trying again I ensured that I made small subtle changes. This made me think of light when taking pictures for my project, I want to avoid this happening to original images, however, having the knowledge of how to edit a dark image will definitely be helpful when working on the photos in post-production.
Week 7 – 10/03/2025 – In the workshop, I worked on cropping a photo to ensure the focus was on the subject. I found this helpful as it ensured that the cropped photo didn’t lose it’s structure. It therefore gives me to option to crop pictures in the final stages, it also means that just because a picture doesn’t look effective at first doesn’t mean it has to be scrapped straight away. Another aspect I worked on today was altering the picture rotation, this allowed the photo and the subjects in the photo to be balanced and in line. This looked particularly effective in the sports photo as it meant the runners were in line in the picture. This is something I would definitely consider using when in post-production.
Week 8 – 17/03/2025 – Final week of tasks/teaching – Today I added a plan to my week 8 post. I have a contact and will now be making steps to ensure I have a date when I will go and take pictures and contact interviews. While this could be in a few weeks it gives me time to practice my photography skills, which I hope to make a post about. This also allows me time to research the subject matter that my article will be written about, I can plan my angle and even start to write mock paragraphs for my article as a way of starting. This could also give me some more ideas of what questions to ask and give me different angles.
I used Snapseed to edit an image on my phone as this is what I will be using in my final photography project. When editing the first image I knew that it needed to be lighter and I wanted the houses to be brighter. In the 1st edit, I liked how bright the houses now were, however, the sky was too bright and had a tint of orange to it which made it look heavily edited and not genuine. I then went back to the original photo to work on it again. This time I found the line between brightening the image without taking it too far and losing the balance of the colour of the sky. I now feel the image has grown from the first without losing its natural colour.
F 1.4 – This was the lowest aperture used, in this image there is more light and the background of the image is less focused. Using this aperture brings out the importance of the photo, it takes away any distraction from the background. This can be a tricky way to photograph an object or person as you need them to be interesting and engaging enough in the image.
F 2.8 – This is the standard setting for an iPhone. This makes sense as it still holds the main focus on the person however you can make out more of the background, therefore giving the photo more context and understanding. It also defines the main subject in a less obvious way and allows the background to look less pixelated.
F 16 – Using this aperture meant that there was a lot less light and more of the image was in focus. To me this looks more like a normal photo but has less quality in the main subject.
This workshop was extremely helpful in making me aware of what the main subject of a photo meant and how to use/not use the background to make a point. I will definitely be experimenting with aperture on my phone so I can use the software for my project.


You must be logged in to post a comment.